Extensions


Looking for help?
Are you looking for help with something not covered on this page?
Check out the Help Center.
- 4 votes
Fast Dial
Fast Dial [v4.14.4]
Welcome to the Fast Dial Home Page!
Fast Dial displays a list of thumbnails of your favorite sites in new tabs.
- Press Ctrl+T to open Fast Dial page.
- Set browser home page to "chrome://fastdial/content/fastdial.html" to have Fast Dial opened on startup.
- Add new sites to Fast Dial by right-clicking site page and choosing "Add to Fast Dial" from the context menu.
- Assign a logo to any site on Advanced page in Properties dialog. Get more logos at userlogos.org site.
- Use drag-n-drop to change thumbnail position. Ctrl+drag to move thumbnail into a folder.
- Scroll Fast Dial page by mouse wheel or PgUp/PgDown keys if there're more bookmarks that fit on the page.
- Enable thumbnail preview in thumbnail Properties dialog. Then left-click and hold on a thumbnail to see the preview.
- Themes. Use predefined ones, get more at userlogos.org or create your own.
- Set any bookmark folder to be Fast Dial home.
- 8 votes
| Attachment | Size |
|---|---|
| 76.96 KB | |
| 76.91 KB | |
| 77.15 KB | |
| 77.84 KB | |
| 69.33 KB | |
| 85.93 KB |
Archived - Fast Dial ChangeLog

- Fixed: some bookmarks failed to remove
- Fixed: search icons were displayed incorrectly
- Added: preference "Add to Fast Dial" with values "Home", "Folders" and "None"
- Added: "New Folder" button into folder selection dialog
- Added: display search suggestions for search textboxes. (Note, search suggestions can be turned on/off in Firefox search preferences.)
- Added: Export/Import of bookmarks.
- Changed: screenshot (generated when exporting theme or bookmarks) size is set to 1024x768.
- Added: translations to Polish (teo), Portuguese (Brazil) (humbertosartini), Portuguese (Portugal) (ricardosimoes). If you like to help translating, please welcome to http://beta.babelzilla.org/projects/p/fastdial/
- Fixed unsaved session problem. (Thanks to Onemen from Tab Mix Plus.)
- Fixed incompatibility with Firefox 48 nightly.
- Removed popup buttons from thumbnails. Instead, use right-click and choose from the popup menu.
- Removed folders submenu from "Add to Fast Dial" context menu item. Instead, folder selection window (resizable) is shown.
- Folders are opened in the current tab not regarding "Open in" preference.
- Removed support of Firefox versions below 11.
- Temporary fix: Modified fastdial.js to set "view_source.tab" to false. This disables Firefox 42's feature of opening "View Page Source" in a new tab (which is not compatible with Fast Dial v4.12). It will open in a new window instead, like in Firefox 41 and below.
- Added: Support for national language URLs.
- Added: Enabled refresh controls for folders in Properties dialog.
- Fixed: Bug in queuing when refreshing multiple thumbnails simultaneously.
- Fixed: Some conflicts with Tab Mix Plus. TMP should work correctly with Fast Dial now.
- Fixed: Focus address bar function
- Fixed: Backgrounds would not load with () in file names
- Fixed: Various other small bugs
- Fixed: Removed usage of "browser.newtab.url" as it conflicted with "about:newtab"
- Fixed: Fast Dial wouldn't load in last tab because of the above change
- Fixed: Incompatibility with Tab Mix Plus
- Fixed: Incompatibility with Old Default Image Style addon (Logos wouldn't load with the addon enabled)
- Added: Ability to cycle through multiple backgrounds. On page open, one background is chosen randomly.
- Added: Favicons are back with Mozilla's new asynchronous api
- Added: centered backgrounds are stretched to the size of the browser window.
- Added: vertical centering of dials.
- Added: Move to different folder option in thumbnail/dial context menu.
- Added: German translation (Thanks to Siggi0904).
- Added: Ukrainian translation (Thanks to dbv92)
- Added: French translation (Thanks to Romaric)
- Removed: support for Firefox versions less than 4.0
- Fixed: Upon initial install, Firefox had to be restarted two times.
- Fixed: multiple search boxes should be working now.
- Fixed: additional themes were not available upon install. Switching between themes didn't work.
- Fixed: Unable to change background image on themes already having an image.
- Fixed: it's now possible to drag-drop thumbnails between pages (scroll mouse wheel while dragging)
- Fixed: When removing a folder, cached images of child thumbnails were not deleted.
- Fixed: preview was displayed semi-transparent
- Fixed: cached preview images were not deleted when deleting a thumbnail
- Fixed: clicking OK on an empty folder properties dialog box resulted in "nbsp" named folder
- Added: a link to get themes from UserLogos.org added into preferences.
- Added: When "Show Fast Dial in new tabs" is unchecked, opening new tab shows "about:newtab" url instead of "about:blank".
- Added: when creating a folder, Logo property is assigned a folder image by default
- Added: Setting in preferences dialog: Fast Dial home folder selection button. Now users can select any bookmarks folder and load it into the Fast Dial homepage. This setting takes the place of the removed Fast dial context menu from bookmarks.
- Removed: Fast Dial context menu from Firefox bookmarks.
- Removed: fr-FR locale, because it's incomplete.
- Removed favicon support in order to make Fast Dial work with Firefox 21 and future versions, as the favicon service had been changed. (Bug 834457) With help from Telega.
- Fixed help button located in preferences dialog. Changed it to link to help section on Userlogos.
- Fixed cell hover buttons (refresh, properties, remove) not displaying properly in Firefox 17 (Thanks Dzirt)
- Fixed dragging&dropping cells when scrolling in Fast Dial page.
- Bug found and fix made by Playermet. Thank you:)
- Fix for change in Firefox 13's code relating to live bookmarks
- Fixed regression from Version 4.2. Users can now successfully use the option in Preferences again to open Fast Dial in a new Tab or not.
- correction for small small error in cell sizing. May improve logo display in some cases. (courtesy of telega)
- added full compatibility with the Firefox 13-14 new tab page change. (with advice from telega)
- Note: -Fast Dial replaces the new tab page-
- Added visibility of userlogos site to properties dialog
- Edited wording of properties dialog for more clarity
- *This version is essentially the same as version 3.6.
- Updated install.rdf for compatibility with latest nightly versions of Firefox.
- Removed code that was incompatible with Firefox 7 and future versions.
- Tested compatible on Firefox versions 7-10*. (Including latest nightly build as of 12/21/11)
- *Special thanks goes to Rneo and ferenc of the userlogos forum for alerting me (Efreak1) of the changes in compatible code for Firefox 7.*
- Fix major incompatibilities with 5.0-6.0
- Fix for transparent logo
- Themes are sorted alphabetically.
- Drag-n-drop works faster.
- Added option to hide Back links into Preferences > General.
- Removed search plugin completely.
- Added Preview feature (was called Zoom in older versions). Check Preview checkbox in thumbnail Properties dialog, then left-click and hold on a thumbnail to see preview.
- General preferences combined into a single page.
- Left clicking on an empty box opens Properties dialog instead of a context menu.
- Technical: removed usage of eval() function.
- Clock image changed back to animated throbber image.
- Removed spam links.
- Search engine is not changed.
- Added help page (by mafi0z).
- Fixed bug with FD page not appearing in new tabs with TMP installed.
- Fixed bug with hight processor usage on startup, which might have caused browser to hang.
- Fixed bug with grayed OK button in Properties dialog on MacOS systems.
- Sorry for all the damage previous updates made to your system.
- Fixed address bar conflict with IE Tab addon.
- Removed tab bar button.
- Removed Toolbars tab in Preferences.
- Middle-click on toolbar button opens FD in new tab.
- Themes. Use one of the predefined themes, get more from userlogos.org, or create your own.
- Search bar (can be turned off in Preferences).
- Fast Dial page can be scrolled by mouse wheel or PgUp/PgDown keys if there're more bookmarks that fit on the page.
- Possibility to auto-hide toolbars.
- Set any bookmark folder to be Fast Dial home.
- Export/import any bookmark folder.
- UserLogos search plugin.
- Browser Navigation bar is hidden by default and shown on mouseover.
- Added "Add" context menu.
- Added "Search" input box on top of FD page.
- Fixed error when thumbnail images were not migrated from 2.11.
- "Back" cell is no more displayed on FD home page.
- Added Import/Export context menu item - rightclick on any bookmark folder (in bookmarks menu, sidebar or bookmark manager) and export/import it.
- Fixed: Drag-n-drop was working incorreclty when "Fixed" thumbnail size is specified in Preferences and FD page has a scrollbar.
- Yahoo Mail issue is fixed
- Back button is created in the first cell of a newly created folder
- Options button in Addons window opens Preferences for the main Fast Dial folder.
- FD toolbar button is automatically added to toolbar upon installation (only once).
Also the button has a drop-down menu with a list of folders for quick access to them. - Context menu is reorganized:
-
-- "Preferences" menu item is shown only when clicking on a free space
-- "Add" menu item is shown when right-clicking on an empty cell
-- "Back" menu item is removed
- Properties dialog changes:
-
-- Added "Slow site" checkbox - lets more time for site loading
-- Added "Refresh All" checkbox - checked by default. Allows to exclude sites from "Refresh All" command.
-- Added "current tab" option for "Open In" option.
- 3 votes
Fast Dial Styles

- 6 votes
Search Gradient Web 2.0 - Fast Dial
 Hover or Focus:
 CODE:
CODE:
@namespace url(http://www.w3.org/1999/xhtml);

@-moz-document url("chrome://fastdial/content/fastdial.html") {

#search {
margin-top: 15px !important;
margin-bottom: -15px !important;
}
#search img {
-moz-opacity: 0.5 !important;
}
#search img:hover {
-moz-opacity: 0.75 !important;
}
#search input {
padding: 1px 8px 0px 8px !important;
border-color: black !important;
-moz-border-radius: 10px !important;
border-width: 1px !important;
font-size: 12px !important;
color: black !important;
height: 20px !important;
width: 250px !important;
font-weight: bold !important;
background: url("/files/layout/FastDial/gradient4search20px.png") center center repeat-x !important;
-moz-opacity: 0.75 !important;
}
#search input:hover, #search input:focus {
-moz-opacity: 1.0 !important;
}
}
Rounder Fast Dial Cells - Stylish Extension
 Now do you see the difference?
User chiaroscuro has found an easy way to do this without CSS Editing..but by using the Stylish Firefox Extension.
If you are using Fast Dial v1.9 or below, you can just Load the code into stylish from here: Link.
And you are done - no need to follow the below steps!!
Thanks to chiaroscuro for posting this on userstyles.
To get yours to do the same you must do the Following:
( If you already have Stylish installed skip to Step 3 )
1. Download Stylish: Link.
2. Restart Firefox
3. Right Click Stlish icon in bottom left corner
4. Choose "Manage Styles"
5. Click "Write.."
The code for Fast Dial v1.9 is:
Now do you see the difference?
User chiaroscuro has found an easy way to do this without CSS Editing..but by using the Stylish Firefox Extension.
If you are using Fast Dial v1.9 or below, you can just Load the code into stylish from here: Link.
And you are done - no need to follow the below steps!!
Thanks to chiaroscuro for posting this on userstyles.
To get yours to do the same you must do the Following:
( If you already have Stylish installed skip to Step 3 )
1. Download Stylish: Link.
2. Restart Firefox
3. Right Click Stlish icon in bottom left corner
4. Choose "Manage Styles"
5. Click "Write.."
The code for Fast Dial v1.9 is:
@namespace url(http://www.w3.org/1999/xhtml);
@-moz-document url("about:blank") {

div.cell { -moz-border-radius: 20px !important; }

}
The code for Fast Dial v2 BETA is:
@namespace url(http://www.w3.org/1999/xhtml);
@-moz-document url-prefix(chrome://fastdial/content/) {

.thumbnail { -moz-border-radius: 20px !important; }

}
Now Give the style a description, and SAVE.- 1 vote
Autohide the Bookmarks Toolbar in Firefox 3
For those who use the Bookmarks Toolbar, especially if in multiple lines, the following code is really useful to get the toolbar out of the way when not needed.
I use this together with the Extension Autohide
I came across this code here
@namespace url("http://www.mozilla.org/keymaster/gatekeeper/there.is.only.xul");
/* Auto-hide bookmarks toolbar */
#PersonalToolbar
{
visibility: collapse !important;
}
#navigator-toolbox:hover > #PersonalToolbar
{
visibility: visible !important;
}
Mmmm...
After all that I have discovered that there is a Firefox Extension which does the same thing..
Please see here
Many thanks
- 0 votes
BMW/Facebook Userlogos Style - Work in Progress
/*

*         BMW/Facebook UserLogos written by M.Shadows

*/
@namespace url(http://www.w3.org/1999/xhtml);
@-moz-document url("about:blank") {
body{ background-color:#ffffff !important }
}
@-moz-document url-prefix(http://userlogos.org/) {
* {
background-color: #ffffff !important;
background-image: none !important;
border-color: #222222 !important;
color: #000000 !important;
font-family: Tahoma !important;
}
a:link {
color: #0d3958 !important;
}
a:visited {
color: #0d3958 !important;
font-weight: bold !important;
}
a:hover,
a:active {
color: #0d3958 !important;
}
em {
color: #3b5998 !important;
}
select,
textarea,
input[name=q],
input[type=text],
input[type=password],
input[type=file] {
background-color: #cbd5df !important;
-moz-appearance: none !important;
color: #000000 !important;
font-family: Tahoma !important;
font-size: .9em !important;
border: 1px solid #bdc7d8 !important;
}
input[type=button],
input[type=submit],
input[type=reset] {
background-color: #5c74a3 !important;
color: #ffffff !important;
font-family: Verdana !important;
font-weight: bold !important;
-moz-appearance: none !important;
border-color: #183262 !important;
}
img {
opacity: 1.00 !important;
-moz-opacity: 1.00 !important;
}
}
Centre Tab text and change Tab Font Color in Firefox
This small Style will enable one to change the Font Color , and Centre Text in the Firefox Tab
I use in conjunction with this style, which alters many of Firefox's Internal Fonts including Tabs
Please alter color to suit.
@namespace url("http://www.mozilla.org/keymaster/gatekeeper/there.is.only.xul");
.tab-text
{
text-align: center !important;
color:#CCCCCC !important;
}
- 0 votes
Change Font for UserLogos
Am playing with this at the moment.
This is a basic starting point.
@namespace url(http://www.w3.org/1999/xhtml);
@-moz-document domain("userlogos.org")
{
*
{
font-family:ENTER FONT HERE !important;
}
}
Another option I am trying at the moment allows certain windows to have a new font and other parts of the UL Page to retain their conventional aspect.
(using bluemarine)
A good use would be a scrpt style font for only the central elements
@namespace url(http://www.w3.org/1999/xhtml);
@-moz-document domain("userlogos.org")
{
p,div.node
{
font-family:ENTER FONT NAME HERE !important;
}
}
- 0 votes
Change Many of the Fonts in Firefox
I use this in conjunction with the small change Tab Font Style I put together
By altering the name of the Font in this Style you will be able to change a number of Fonts that appear in Firefox.
Work in progress.
@namespace url("http://www.mozilla.org/keymaster/gatekeeper/there.is.only.xul");
menubar > menu, menubar, menubutton, menulist, menuitem
{
font-size: 12px !important;
font-family: FONT NAME HERE !important;
font-weight: normal !important;
}
menupopup > *
{
font-size: 12px !important;
font-family: FONT NAME HERE !important;
font-weight: normal !important;
}
#urlbar
{
font-size: 12px !important;
font-family: FONT NAME HERE !important;
font-weight: normal !important;
}
#ubhist-popup > .popup-internal-box, .textfield-popup > .popup-internal-box
{
font-size: 12px !important;
font-family: FONT NAME HERE !important;
font-weight: normal !important;
}
dialog, box, button, page, label, caption, textbox, input, select
{
font-size: 12px !important;
font-family: FONT NAME HERE !important;
font-weight: normal !important;
}
window
{
font-size: 12px !important;
font-family: FONT NAME HERE !important;
font-weight: normal !important;
}
#sidebar
{
font-size: 12px !important;
font-family: FONT NAME HERE !important;
font-weight: normal !important;
}
- 0 votes
Controlling the layout of Userlogos Front Page - Version 1 - for Blue Marine
This is the first effort to try and stop the Userlogos Page in Bluemarine from going very wide in the center section when a Logo entry is for some reason causing this.
Have not got on top of this one yet.
But it did the job when the page went very wide
Am trying to get it so it matches the standard page,but not there yet.
This Style is made to have an effect on the Frontpage only
I need to make a similar Style for the Logo/Logo search page
I hope you find this useful
@namespace url(http://www.w3.org/1999/xhtml);
@-moz-document url("http://userlogos.org/")
{
div.node
{
width:400px; !important
}
div.content
{
width:400px; !important
}
body
{
td#sidebar-left
{
width:50px; !important
}
td#sidebar-right
{
width:50px; !important
}
}
- 0 votes
Detailed Instructions how to Load a Style into Stylish from UL
For more general information about Stylish please see here
________________________________________________________________________________________
Typically Styles written for Stylish are simply downloaded from Userstyles.
Find the Style you want and click load into Stylish and all is done
___________________________________________________________________________________________
However on this site we have a number of inhouse Styles.
To Load these one has to go though the following steps
1. Download Stylish
2. Copy all the text of the Style from the UL page
3. Open Stylish Manage Styles Window
4. Click on write (write a new style/blank)
5. Paste in the text that you have copied.
6. Name the file
7. Save the file
8. If you get any errors it would suggest that you might have missed some detail when you selected the text, so please try again
________________________________________________________________________________________
- 0 votes
FD Styles Archive
This is an archive of Styles made for earlier Versions of Fast Dial and Experimental Versions
- 0 votes
"Sample CSS" - Fast Dial
This is not strictly a Stylish Style at all.
But it is in css and there is nowhwere else to put it right now.
_______________________________________________________________________________________
This was telega's sample css that he put together for Fast Dial 2.5-6.
It is a useful template for creating a css for Fast Dial
(It was very easy in 2.15-6 to load and save css versions to Themes)
I will put 2 Versions here
The original telega Version
The expanded Stylish Version of the same code that a user can modify to suit.
Original telega Version
  body { background-image: none; background-repeat: repeat;

background-position: top left; font-family: 'Tahoma'; font-size: 11;

background-color: #000000; } .back { background-image:

url(chrome://fastdial/skin/back.png); } #grid { border-spacing: 10; }

.thumbnail { background-color: transparent; border: 1px solid #d3d3d3;

opacity: 1; } .title { color: #000000; background-color: #eeeeee;

border-top: 1px solid #d3d3d3; } div.thumbnail:hover, .hover {

background-color: transparent; border: 1px solid #d3d3d3; opacity: 1; }

div.thumbnail:hover .title, .hover .title { color: #000000;

background-color: #e8e8e8; border-top: 1px solid #d3d3d3;
3. Stylish Version (modified)
@namespace url(http://www.w3.org/1999/xhtml);
@-moz-document url("chrome://fastdial/content/fastdial.html") {
}
body
{
/*background-image: none !important;*/
/*background-repeat: repeat !important;*/
background-position: center !important;
font-family: 'Tahoma' !important;
font-size: 11px !important;
background-color: black !important;
}
.back
{
background-image: url(chrome://fastdial/skin/back.png) !important;
}
#grid
{
border-spacing: 10px !important;
}
div.thumbnail
{
background-color: transparent !important;
border: 1px solid transparent !important;
opacity: 0.9 !important;
}
div.thumbnail:hover
{
background-color: transparent !important;
border: 1px solid transparent !important;
opacity: 1.0 !important;
}
div.title
{
color: transparent !important;
background-color: transparent !important;
border-top: 1px solid transparent !important;
}
div.title:hover
{
color: white !important;
background-color: transparent !important;
border-top: 1px solid transparent !important;
}
- 2 votes
Firefox 3.5 - Annoying Search Bookmarks and History in the URL Field
Came across these few lines of code that remove the very annoying
Search Bookmarks and History in the URL Field.
These words appear when you are in the Root Folder in Fast Dial
Here is the link to the Userstyles Page
http://userstyles.org/styles/19165
Pop these few lines into Stylsh
And things will be back to normal.
Perfect for Fast Dial users !
@namespace url(http://www.mozilla.org/keymaster/gatekeeper/there.is.only.xul);
#urlbar[empty="true"] {
color: transparent !important;
}
- 0 votes
Hide Favicons & other stuff in v2.15 beta 11 - Fast Dial
This is just a temporary fix due to shortcomings in Preferences in Version 2.15 beta 11
Please copy paste into Stylish.
To simply remove Favicons please use this
@namespace url(http://www.w3.org/1999/xhtml);
@-moz-document url("chrome://fastdial/content/fastdial.html") {
}
.title img
{
-moz-opacity: 0.0 !important;
}
or
@namespace url(http://www.w3.org/1999/xhtml);
@-moz-document url("chrome://fastdial/content/fastdial.html") {
}
.title img
{
display:none !important;
}
---
Help (top right) only appears on hover
Favicons the same (does not work as favicons so small)
Fast Dial logo removed
In 2.15 beta 11 favicons appear on hover.
So this works well with Title also appearing on Hover
---
@namespace url(http://www.w3.org/1999/xhtml);
@-moz-document url("chrome://fastdial/content/fastdial.html") {
}
/* help button top right */
a#help
{
-moz-opacity: 0.0 !important;
}
a#help:hover
{
-moz-opacity: 1.0 !important;
}
/* favicons */
.title img
{
-moz-opacity: 0.0 !important;
}
.title img:hover
{
-moz-opacity: 1.0 !important;
}
/* fast dial logo */
img#enable
{
-moz-opacity: 0.0 !important;
}
- 0 votes
Hide help except on Hover Fast Dial 2.23
@namespace url(http://www.w3.org/1999/xhtml);
@-moz-document url("chrome://fastdial/content/fastdial.html") {
}
/* help button top right */
a#help
{
-moz-opacity: 0.0 !important;
}
a#help:hover
{
-moz-opacity: 1.0 !important;
}
- 0 votes
Hide help permanently 2.23
Please load into Stylish
This code will stop the word Help from appearing in your Fast Dial Screen.
@namespace url(http://www.w3.org/1999/xhtml);
@-moz-document url("chrome://fastdial/content/fastdial.html") {
}
/* help button top right */
a#help
{
display:none !important;
}
- 0 votes
Larger Fast Dial Cells on hover
Playing around with this at the moment.
Works after a fashion.
Please change size to suit
Best maybe to keep original ratio size of cell.
So check computed values in Fast Dial/Preferences/General/General/Size
before changing values in code
@namespace url(http://www.w3.org/1999/xhtml);
@-moz-document url("chrome://fastdial/content/fastdial.html") {
}
div.thumbnail:hover
{
width: 480px !important;
height: 360px !important;
}
- 0 votes
Opacity in Fast Dial 1.x - Stylish Extension
This description will be expanded but is at present quite usable.
--------------------------------------------------------------------------------------
It is quite possible to alter the Opacity of all the Cells in Fast Dial 1.x
To do this one makes use of a very useful Firefox Extension called Stylish.
There is a short introduction to Stylish here
To simply download Stylish from the Mozilla Add-Ons page go here.
The best site for finding Styles to use in Stylish is called Userstyles
At the moment there are a couple of Styles on the Userstyles Site that will enable you to alter the Opacity of your Fast Dial Cells
Style 1 enables one to change the Opacity of All Cells in Fast Dial 1.x.
Also it allows one to alter the Opacity of Dialling Cells Seperately from Group Cells.
Style 2 is eactly the same as Style 1 but it has the added possibility of altering the opacity of your cell when you hover over it with the Mouse.
.
- 1 vote
PedroMRP's Tranparent Search Bar - Fast Dial
This fix was invented entirely by PedroMRP here .
It was placed in a Style format for ease of loading.
---
Text colour of course can be changed to suit in this line
color: white;
font size in this line
font-size: 1.2em;
---
this is the effect
Before (your wndow may also be white) Default v2.14 Toolbar

after

@namespace url(http://www.w3.org/1999/xhtml);
@-moz-document url("chrome://fastdial/content/fastdial.html") {
}
#search {
margin-top: 5px;
margin-bottom: -5px;
}
#search input {
font-size: 1.2em;
color: white;
border: 1px solid lightgray;
background: transparent;
}
- 2 votes
Rounder Cells in FD1 - Fast Dial
This is an adaption of a Lain_13 idea see here to be used in Fast Dial 1.x
The whole matter is discussed in detail in Mafi0z Tutorial Rounder Fast Dial Cells
This can also be downloaded directly into Stylish from Userstyles here
@namespace url(http://www.w3.org/1999/xhtml);
@-moz-document url("about:blank") {
}
div.cell
{
-moz-border-radius: 25px !important;
}
- 1 vote
Stylish Version 1.0.0 plus
There is it seems a new Version of Stylish
References to new Stylish Logo here
Mozilla Addons/ AMO Ver 1.0.1 (May 4 ) Download link
There a number of not so positive reports on AMO to this Version
Old version better
by Kellchmia on May 5, 2009
I don’t want Jason to feel bad but I really like the old version.
Other users have mentioned the reasons.
Some Feedback to Version 1.0 (Jason Barnabe) Link
---
Further more detailed comments on Version 1.0 here
---
Please see more detailed comments on Version 1.0a here
---
Please see more detailed comments on Version 1.0.1beta here
How to get old icons back, revert to previous version and other useful tips by Jason Barnabe (plus a thread devoted to the whole question) here
Stylish Nostalgia Icons here (uses old icons in new Version)
But effects icons both in status bar and addons panel.
But probably can be edited to suit, but have not tried as yet.
There are a number of facilities that are being permanently removed.
No important! button anymore.
No colorpicker either.
My sympathies are with Drugoy...
Two useful styles to go with Version 1.0.1
Stylish - Manage Window beautified
Stylish - Edit Window beautified
So modified by Stylish now becomes:

- 0 votes
Temporary Fix to remove Search Icon in 2.23b
The problem of turning off the display of the Search Bar in Fast Dial v2.23b has been resolved in Version 2.23b1
Please see also see discussion here
______________________________________________________________________________________
It is easy to hide the search bar in Version 2.22b
But there is a setting change in Version 2.23earlybeta (not yet released) that is not so effective.
I am told that I should set in Preferences/General the Search value to zero
I have done that
But it has no effect at all.

Either I will discover how to remove it, or maybe Fast Dial will be changed.
However in the meanwhile for anyone that has a similar problem, one can make the search bar transparent and remove the search engine faviocon with this Style.
@namespace url(http://www.w3.org/1999/xhtml);
@-moz-document url("chrome://fastdial/content/fastdial.html") {
}
img#search-icon
{
display:none !important
}
- 0 votes
Transparency with Hover for v1.x - Fast Dial
This Style is for Fast Dial 1.x
Thanks to telega a very well designed and easily set up Opacity setting is in place in Fast Dial 2
This Style can be loaded directly into Stylish from here.
________________________________________________________________________________________
@namespace url(http://www.w3.org/1999/xhtml);
@-moz-document url("about:blank") {
}
/*-----for dialling cells-----*/
.image
{
opacity: 0.5;
}
.image:hover
{
opacity: 0.0;
}
/*-----for cells with group-----*/
.parent
{
opacity: 0.5;
}
.parent:hover
{
opacity: 0.0;
}
- 1 vote
Voting display colour - UserLogos
Please enter the colours or images of your choice to make your own display.
Hover and opacity settings are offered should you want to use them
This is the gradient Version seen against a dark background

This Version at the moment set to grey with change of opacity on hover
Please enter the colours you would like to use and change settings to suit.
@namespace url(http://www.w3.org/1999/xhtml);
@-moz-document domain("userlogos.org") {
}
div.foreground
{
background:grey !important;
-moz-opacity: 0.75 !important;
}
/* colour on hover */
div.foreground:hover
{
background:grey !important;
-moz-opacity: 1.0 !important;
}
This is a variation using Mafi0z Gradient that he made for the Search Bar
See picture above
@namespace url(http://www.w3.org/1999/xhtml);
@-moz-document domain("userlogos.org") {
}
div.foreground
{
background:url("/files/layout/FastDial/gradient4search20px.png") center center repeat-x !important;
-moz-opacity: 0.75 !important;
}
div.foreground:hover
{
-moz-opacity: 1.0 !important;
}
- 1 vote
change cell size in Fast Dial
This Style is just sitting here to be adapted by different users for their own needs
If you change the values you can use Fast Dial to calculate the height for you
Put this together really for anyone who wanted to make cells smaller than the Fast Dial minimum size
@namespace url(http://www.w3.org/1999/xhtml);
@-moz-document url("chrome://fastdial/content/fastdial.html") {
.box
{
width:400px !important;
height:300px !important;
}
}
- 0 votes
Fast Dial Transparent For Vista And Windows 7 Only.
This code makes fast dial and all of firefox transparent but the down side is it makes all websites transparent, which some people will like it some people won't.
Beginners can have a look at the beginning of this thread here http://userlogos.org/node/12345
Make sure you remove all other transparent apps, plugins, addons or stylish glass codes.
You will need to add both styles or it will not work, firefox may freeze when enabling styles.
If firefox freezes click on show desktop on windows and restore firefox, will not happen again until you disable any of the styles.
Add New Stylish Name It Glass Firefox.
@namespace url(http://www.mozilla.org/keymaster/gatekeeper/there.is.only.xul);
*:not([style*="rgb"]){
-moz-appearance: -moz-win-glass !important ;
background: transparent !important;
color:white !important;
}
Add Another Stylish Name It Glass Websites and Fast Dial.
@namespace url(http://www.w3.org/1999/xhtml);
@-moz-document url("") {
*:not([style*="rgb"]){
-moz-appearance: transparent !important ;
color: white !important;}
}
@-moz-document url-prefix("http://"), url-prefix("https://") {
*:not([style*="rgb"]){
background: black !important ; }
}
Click on this link for expanded version
http://i44.tinypic.com/2qdsrw2.jpg

Help in using Stylish
________________________________________________________________________________________
This is a collection of links that I have put together for those interested in using the Firefox Extension Stylish
Download Stylish
Recent link
http://www.honestlyillustrated.com/userstyles/stylishguide/
It's all Text Download
Ver 0.8.5 only !!!!
Later Versions don't work in Stylish !!!!!!!
----------------------------------------------------------------------------------------
Stylish Quick Guide
----------------------------------------------------------------------------------------
Stylish Edit Window Tutorial by ChoGGi
----------------------------------------------------------------------------------------
ChoGGi's Guide to using Stylish Tutorial
----------------------------------------------------------------------------------------
Custom Userstyle made just for viewing ChoGGi's Guide to using Stylish by whatrevolution
----------------------------------------------------------------------------------------
whatrevolution's Guide to using Stylish Tutorial
here
----------------------------------------------------------------------------------------
Valacar's Specificity Guide Thread/Tutorial
here
----------------------------------------------------------------------------------------
Best way to design with Stylish Interview
Globex designs
----------------------------------------------------------------------------------------
Stylish Forum
----------------------------------------------------------------------------------------
----------------------------------------------------------------------------------------
- 0 votes
Modified Version of Midnight Surfing Global Dark Style for Userlogos
Thanks to gumanov for this
Without this modification a number of images would not be visible on userlogos
@namespace html url(http://www.w3.org/1999/xhtml);
@namespace xul url(http://www.mozilla.org/keymaster/gatekeeper/there.is.only.xul);
/* Browser Background */
browser[type="content-primary"] {background-color: #141414 !important;}
@-moz-document url-prefix(http://), url-prefix(https://), url-prefix(ftp://), url-prefix(file://) {
/*No background images. try to exclude icons, other misc items. */
*:not(:empty):not([onclick*="open"]):not(SPAN):not([class*="stars"]):not([id*="stars"]):not([id="rating"]):not([class="rating"]):not([class*="SPRITE"]):not([id*="SPRITE"]):not([id*="lbImage"]):not([id*="sideheader"])
{ background-image: none !important }
/* Basic Bodies */
HTML, BODY { background: none #141414 !important }
/* Make descendents of the body element transparent. Formerly "DIV + SPAN" rules. */
BODY * {background-color: transparent !important}
/* Give id's BG hopefully */
DIV[id] {background-color: inherit !important}
/* Filter non-icons */
SPAN:not(:empty):not([class*="icon"]):not([id*="icon"]):not([class*="star"]):not([id*="star"]):not([id*="rating"]):not([class*="rating"]):not([class*="Sprite"]):not([class*="sprite"]) {
background: none transparent !important;
border-color: #000 !important}
/* Try to contrast containers */
html:root > BODY > * > * > * > *:not(INPUT):not([onclick]) > DIV:not(:empty):not([id])
{background: none #1c1c1c !important}
/* :::::::: Text Presentation :::::::: */
SUMMARY, DETAILS {background-color: inherit !important}
ABBR, PROGRESS, TIME, LABEL,
.date {color: #CDEFC2 !important}
MARK,
CODE, PRE,
BLOCKQUOTE,
[class*="quote"],
TD[style*="inset"][class="alt2"] { background-color: #00090F !important }
/* :::::::: Headings + Header :::::::: */
/* Header gradient rules */
HEADER, #header {background: -moz-linear-gradient(#333,#141414) transparent !important;}
#header h1 {background-color: transparent !important;}
H1, H2 {
background: none #28313E !important;
border-radius: 5px !important;
-moz-border-radius: 5px !important;
-webkit-border-radius: 5px !important;}
H3, H4 {
background: none #2A3731 !important;
border-radius: 5px !important;
-moz-border-radius: 5px !important;
-webkit-border-radius: 5px !important;}
H5, H6 {background: none #372A2A !important}
/* :::::::: Lists :::::::: */
DT {background-color: #2B3135 !important}
DL, DD {background-color: #232323 !important}
LI, UL {background-color: inherit !important}
LI A:not([class*="icon"]):not([id*="icon"]):not([onclick]),
DT A:not([class*="icon"]):not([id*="icon"]):not([onclick])
{background-image: none !important; text-indent: 0 !important}
/* :::::::: list Item highlight :::::::: */
LI[class*="item"] A:hover,
LI[class*="item"]:hover,
[class*="menuitem"]:hover /* Not list item, but still useful*/
{background-color: #2E2B2F !important}
/* :::::::: Tables, cells :::::::: */
TABLE {background-color: #232323 !important; border-color: #333 !important}
TABLE TABLE {background: #191919 !important;}
TH, CAPTION {background-color: #353535 !important}
/* :::::::: Input :::::::: */
/*Basic*/
INPUT *, TEXTAREA * {color: #DDD !important;} /* anonymous divs */
HTML BODY INPUT:not([type="image"]), button,
HTML BODY TEXTAREA {
background: none #353535 !important;
-moz-appearance: none !important;
-webkit-appearance: none !important;
color: #DDD !important;
border: solid 1px #777 !important;
border-radius: 0 !important;
-moz-border-radius: 0 !important;
-webkit-border-radius: 0 !important;
opacity: 1 !important;}
/* Style reset. */
HTML BODY INPUT[type="checkbox"] {-moz-appearance: checkbox !important; -webkit-appearance: checkbox !important;}
HTML BODY INPUT[type="radio"] {-moz-appearance: radio !important; -webkit-appearance: radio !important;}
/* :::::::: Custom styling :::::::: */
HTML:root INPUT[type="button"],
HTML:root INPUT[type="submit"],
HTML:root INPUT[type="reset"],
HTML:root BUTTON {
color: #EEE !important;
background-color: #222437 !important;
-moz-box-shadow: inset 0 1px rgba(255,255,255,0.2), inset 0 10px rgba(255,255,255,0.1), inset 0 10px 20px rgba(255,255,255,0.15), inset 0 -15px 30px rgba(0,0,0,0.2) !important;
-webkit-box-shadow: inset 0 1px rgba(255,255,255,0.2), inset 0 10px rgba(255,255,255,0.1), inset 0 10px 20px rgba(255,255,255,0.15), inset 0 -15px 30px rgba(0,0,0,0.2) !important;}
HTML:root INPUT[type="button"]:hover,
HTML:root INPUT[type="submit"]:hover,
HTML:root INPUT[type="reset"]:hover,
HTML:root BUTTON:hover {
color: #FFF !important;
background-color: #31344F !important;
border-color: #5F687F !important;
-moz-box-shadow: inset 0 1px rgba(255,255,255,0.3), inset 0 10px rgba(255,255,255,0.2), inset 0 10px 20px rgba(255,255,255,0.25), inset 0 -15px 30px rgba(0,0,0,0.3) !important;
-webkit-box-shadow: inset 0 1px rgba(255,255,255,0.3), inset 0 10px rgba(255,255,255,0.2), inset 0 10px 20px rgba(255,255,255,0.25), inset 0 -15px 30px rgba(0,0,0,0.3) !important;}
HTML:root INPUT[type="image"] {opacity: .85 !important}
HTML:root INPUT[type="image"]:hover {opacity: .95 !important}
/* Drop-down menu */
SELECT, OPTION, optgroup{
background: none #383838 !important;
border-color:#555 !important;
color:#f1f1f1 !important;
-moz-appearance: none !important;}
/* :::::::: Misc :::::::: */
ADDRESS {background: none #333 !important}
HR {background: none #444 !important}
.current {color: #FFF !important;} /*currently viewed page*/
/* Remove Rounded Corners, Borders, Spacer, Padding images */
IMG[src*="spacer"]:empty,
[id*="round"]:empty,
[id*="bottom"]:empty, [class*="bottom"]:empty, [class*="Bottom"]:empty,
[id*="top"]:empty, [class*="top"]:empty, [class*="Top"]:empty,
[class*="spacer"]:empty
{background-image: none !important;}
/* Menus and Navigation */
NAV,
MENU,
/*Common naming conventions - in case previous declarations fail to give solid BG*/
HTML BODY [class*="open"],
HTML BODY [id*="Dropdown"],
HTML BODY [id*="dropdown"],
HTML BODY [class*="Dropdown"],
HTML BODY [class*="dropdown"],
HTML BODY [id*="menu"]:not(SELECT),
HTML BODY [class*="menu"]:NOT(SELECT),
HTML BODY [class*="tooltip"],
HTML BODY [class*="popup"],
HTML BODY [id*="popup"],
/* Notes, details, etc. Maybe useful */
HTML BODY [class*="note"],
HTML BODY [class*="detail"],
HTML BODY [class*="description"]
{background-color: #232323 !important}
/* Also common */
[class*="content"], [class*="container"] {background-color: #1c1c1c !important}
/* Headers, Logos */
[id*="masthead"] a,[id*="header"] a,
[id*="logo"] a, [class*="logo"] a
{text-indent: 0 !important;}
/* Instead of increasing specificity rating by using :not, set rules separately */
HTML:root BODY [class*="layer"],
HTML:root BODY #lightbox-nav,
HTML:root BODY #imageContainer {background-color: transparent !important}
/*::::::::::::::::::::::::::::::::::::::::::::::::::::::::::::::::::::::::::::::::*/
/* Universal - sets color of text, border */
* {
color: #CCC !important;
border-color: #444 !important;
outline-color: #444 !important;
text-shadow: none !important;}
html *:after,
html *:before
{color: #CCC !important;
border-color: #666 !important;
background: none transparent !important}
/* Link */
a:link,
a:link *:not(IMG){
color: #B1CBF7 !important;
background-color: transparent !important;
border-color: #666 !important;}
a:visited,
a:visited * {color: #CDB4E7 !important;}
a:hover,
a:hover *:not(IMG){
color: #FFE900 !important;
background-color: #363037 !important;
border-color: #999 !important}
html [href*="#"]:hover {color: #FFE900 !important; background-color: transparent !important;}
/* Event Handlers/Attributes */
[onclick],
[ondblclick],
[onmousedown]
{color: #DFD5BC !important;
text-indent: 0 !important}
[onclick]:hover,
[ondblclick]:hover,
[onmousedown]:hover
{color: #FEFF97 !important;}
/* Make images transparent */
IMG { opacity: .75 !important;}
IMG:hover { opacity: 1 !important; background-color: #888 !important; }
svg {background: none #666 !important;}
/* Highlight */
::-moz-selection {background-color: #626F61 !important; color: #F6F7B9 !important;}
/* :::::::: Specific Fixes :::::::: */
/* google search link fix */
.g .r {background-color: transparent !important;}
/* google result hover highlight*/
div.vsc:hover > .vspi, div.vso > .vspi {background: none transparent !important; border: none !important;}
}
/* :::::::: About... :::::::: */
@-moz-document url(about:newtab) {
window {background: #141414 !important;}
#newtab-scrollbox {
background-color: transparent !important;
background-image:
url("chrome://browser/skin/newtab/noise.png"),
-moz-linear-gradient(transparent,transparent) !important }
.newtab-title {background-color: rgba(0,0,0,.75) !important; color: #eee !important;}
}
@-moz-document url(about:blank) {
html, html * {
background: none #141414 !important;
color: #CCC !important;}
}
@-moz-document url-prefix("about:neterror") {
html, body {background-color: #353535 !important; color: #CCC !important}
#errorPageContainer {background-color: #222 !important; border-color: #666 !important}
#errorPageContainer button {opacity: .8 !important}
/*resurrect pages FF extension*/
#resurrect {background-color: #333 !important; border-color: #000 !important}
}
- 0 votes
Moving your Styles in Stylish from one Profile to Another
----------------------------------------------------------------------------------------
If one does a Full Profile Backup and Restore with Febe then all the styles as well as Stylish will be restored in the New Profile.
-----------------------------------------------------------
If you use Febe to simply copy your extensions then it will not copy the Styles.
---
However I have learned from Mafia_Penguin the following regarding Febe :
Go to Tools>FEBE>FEBE Options
Click on "User-defined backups".

Click "New".
Fill out the information, and check "Include in backup". Click "Post entries and exit".

This is a useful procedure
_________________________________________________________________________________________
If you want to recover your styles from an otherwise corrupt profile, it is quite sufficient to do the following.
1. Look for the file stylish.rdf in the Profile you want to copy FROM.
2. Copy the contents of the file in 1. into your stylish.rdf in the Profile you want to copy tp, being careful at the same time to remove the previous contents
This system can save a lot of work, as many Styles may also have been customised.
- 1 vote
Remove/Hide Cell Buttons in Fast Dial Display
@namespace url(http://www.w3.org/1999/xhtml);

@-moz-document url("chrome://fastdial/content/fastdial.html") {

div.button

{
display:none !important
}

}
- 1 vote
Rounded cells on hover for Fast Dial with glow for dark background
Have been looking at ways of improving on the previous Version
The previous Version had this effect on hover

This is a new Version without glow:
@namespace url(http://www.w3.org/1999/xhtml);
@-moz-document url-prefix(chrome://fastdial/content/)
{
.thumbnail
{
border: 7px solid transparent !important;
-moz-border-radius:10px !important;
}
}
This will have this effect:

This other new Version includes a glow for a dark background
Here is the code
@namespace url(http://www.w3.org/1999/xhtml);
@-moz-document url-prefix(chrome://fastdial/content/)
{
.thumbnail
{
border: 7px solid transparent !important;
-moz-border-radius:10px !important;
-moz-box-shadow:0px 0px 10px #ffffff !important;
}
}
effect of with glow

and here the same cell with a Logo on hover with glow

- 0 votes
Rounder Cells in FD2 - Fast Dial
This Style was first posted on the Mozilla Russia Fast Dial Forum by Lain_13 here in English. (here in Russian)
What this Style does is to allow the user to make the border of each cell rounder in FD 2 .
This whole matter is described in detail in Mafi0z Tutorial Rounder Fast Dial Cells
The great usefulness of this style is if you like to have a change of background colour in a cell on hover, then this style will enable you to have a rounded cell just on hover, this will then create a coloured rounded cell.
This is somehow more elegant and makes a change from the square.
This also of course works well if you have a blank transparent logo loaded in a cell.
Works well too if opacity of the resulting colour is changed on hover as well.
---
( If you already have Stylish installed skip to Step 3 )
1. Download Stylish: Link.
2. Restart Firefox
select/copy all the code below
3. Right Click Stylish icon in bottom right corner on the status bar
4. Choose "Manage Styles"
5. Click "Write new Style/Blank"
Give a title to the Style
Paste in the code into the Window
then save
---
@namespace url(http://www.w3.org/1999/xhtml);
@-moz-document url-prefix(chrome://fastdial/content/)
{
.thumbnail
{
-moz-border-radius: 10px !important;
}
}
*Change the -moz-border-radius value to suit.
- 1 vote
Rounder cells for white background on hover with shadow effect
Have been looking at ways of improving on the previous Version
Many thanks to LAMj
This Version will add a drop shadow to the cells on hover
Here is the code
@namespace url(http://www.w3.org/1999/xhtml);
@-moz-document url("chrome://fastdial/content/fastdial.html")
{
.thumbnail {
border: 7px solid #ffffff !important;
-moz-border-radius:10px !important;
-moz-box-shadow:3px 3px 10px -2px #000000 !important;
}
}
This is the effect

- 0 votes
Stylish - Remove horizontal rule (hr) lines on Userlogos
This Style was put together for MShadows
see comment here
This should remove all horizontal rule lines (hr) on UL when loaded into Stylish.
Here are some test lines (should disappear):
Enjoy !
@namespace url(http://www.w3.org/1999/xhtml);
@-moz-document domain("userlogos.org")
{
hr
{
display:none !important;
}
}
- 0 votes
Stylish install Problems with AVG Version 9.0
Am running Stylish Version 1.0.2 in Firefox 3.5.3
Fine
Works well.
Have tried to install more recent Versions of Stylish and Stylish refuses to install.
Have Googled the problem.
Have tried disabling AVG Free(Version 9)(recently installed)
Did not work
Have tried loading Firefox in safe mode.
Did not work
Uninstalled AVG Free (Version 9)
Managed to load new Version of Stylish with no problem.
MOST TIRESOME !!!!!!!!!!!!!!!!!!!!!!!!!!!!!!!!!!!!!!
- 0 votes
Transparent Logos on UL - Black to a finer checkerboard - chiaroscuro
Posted by chiaroscuro
The below is a developement of an original proposal by Mafi0z here.
This was then developed to make this Style.
This Style will allow you to view all Transparent Logos on UL with a background custom colour of your choice.
It will also show a checkerboard background on Hover to confirm that the Logo is indeed Transparent.
Please change the background colour in this line to suit your own background
For the effect of this Style on a transparent Userlogos Logo (by Grawl) please see bottom of page
background: black !important;
This is the Style. Please copy paste into Stylish.
/*

*         Modification of original Code written by of Mafi0z (http://userlogos.org/node/3675)

*/
@namespace url(http://www.w3.org/1999/xhtml);
@-moz-document domain("userlogos.org") {
.node .content .field-type-image img
{
background: #202020 !important;
}
.node .content .field-type-image img:hover
{
background: #eee url('http://i41.tinypic.com/2ynijq9.png') 0 0 repeat !important;
}
}

- 0 votes
Transparent Logos on UL - Checkerboard to Black - macleod.mac's
The purpose of this style is to easily show what logos look like both on a light and dark background. Light checkerboard is default, with black on mouseover.
/*

*         Modification of original Code written by of Mafi0z (http://userlogos.org/node/3675)

*/
@namespace url(http://www.w3.org/1999/xhtml);
@-moz-document domain("userlogos.org") {
}
.node .content .field-type-image img {

background: #eee url('http://i41.photobucket.com/albums/e257/MaFi0z/checkerboard.png') 0 0 repeat !important;

}
.node .content .field-type-image img:hover
{
background: black !important;
}
- 0 votes
Transparent Logos on UL - Original suggestion for chequerboard style - gumanov
This was Mafi0z first ground-breaking suggestion
This causes transparent logos to have a checkerboard background, enabling quick identification
First posted here
.node .content .field-type-image img {
background: #eee url('http://i41.photobucket.com/albums/e257/MaFi0z/checkerboard.png') 0 0 repeat !important;
}
- 0 votes
Transparent Logos on UL - White to Black - no checkerboard
/*

* Modification of original Code written by of Mafi0z (http://userlogos.org/node/3675)

*/
@namespace url(http://www.w3.org/1999/xhtml);
@-moz-document domain("userlogos.org") {
}
.node .content .field-type-image img
{
background: #ffffff !important;
}
.node .content .field-type-image img:hover
{
background: #101010 !important;
}
- 0 votes
Transparent Logos on UL - black to coarse checkerboard - chiaroscuro
Posted by chiaroscuro
The below is a developement of an original proposal by Mafi0z here.
This was then developed to make this Style.
This Style will allow you to view all Transparent Logos on UL with a background custom colour of your choice.
It will also show a checkerboard background on Hover to confirm that the Logo is indeed Transparent.
Please change the background colour in this line to suit your own background
For the effect of this Style on a transparent Userlogos Logo (by Grawl) please see botoom of page
background: black !important;
This is the Style. Please copy paste into Stylish.
/*

*         Modification of original Code written by of Mafi0z (http://userlogos.org/node/3675)

*/
@namespace url(http://www.w3.org/1999/xhtml);
@-moz-document domain("userlogos.org") {
.node .content .field-type-image img
{
background: #202020 !important;
}
.node .content .field-type-image img:hover
{
background: #eee url('http://i39.tinypic.com/2rxuro4.png') 0 0 repeat !important;
}
}

- 0 votes
View the Userlogos Page in Wide Mode (BlueMarine only)
The advantage of this Style, is that the document that you are working on/or reading, fills the whole page in Firefox, and you can concentrate on the contents of the whole page a lot easier, especially if there are images..
For use with BlueMarine Theme only ....
If you want to you can set it up just for one thread.
Go stylish, write style for this page, and post in the rest of the code.
For this post for example your Style would start:
@namespace url(http://www.w3.org/1999/xhtml);
@-moz-document url("http://userlogos.org/node/7083")
{
td#sidebar-left
{
display:none !important
}
td#sidebar-right
{
display:none !important
}
}
Use the following code for all the pages of Userlogos
@namespace url(http://www.w3.org/1999/xhtml

@-moz-document domain("userlogos.org") {
td#sidebar-left
{
display:none !important
}
td#sidebar-right
{
display:none !important
}
}
- 0 votes
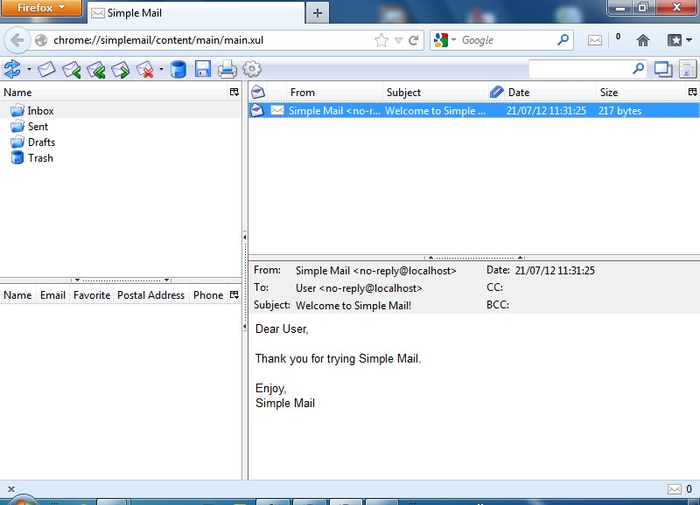
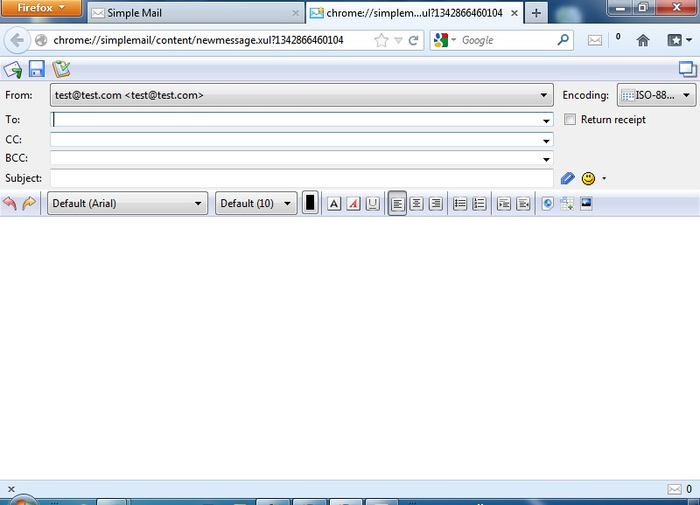
Simple Mail
Simple Mail [v2.90]
Welcome to the Simple Mail Home Page!
Simple Mail is a mail client for Firefox. It allows you to get notified, read and write messages for multiple email accounts inside Firefox.
Usage: Configure one or more accounts in Preferences, set account refresh time and get notified of new mail. When new mail arrives, Simple Mail shows new messages count in status bar. You can click Simple Mail icon to open received messages in a separate browser tab. Also Simple Mail has a toolbar button, which you can put on toolbar to access SM easily.
Features:
- Accounts
- Multiple email accounts
- POP3/IMAP/SMTP protocols
- Automatic checking on specified timeout
- Address Book
- Autocomplete box suggests recipient names/addresses as you start typing them
- Groups of contacts
- Display Address book in main Simple Mail window
- Folders
- Create custom folders
- Drag-n-drop folders and messages into folders
- Use filters to automatically sort incoming messages into folders
- New message composition
- WYSIWYG editor. Customize font/color of your message
- Smiles. Use predefined smiles or easily add your own
- URLs are automatically converted to hyperlinks as you type them
- Appearance
- Right-click on toolbar to choose "icons/text/icons and text" mode
- Additional columns for folders can be turned on (unread/total/size)
- Switch window layout by clicking on an icon in the top-right corner
- Other
- Store your mailbox on a Flash drive
- Sort messages by clicking on column headers
Filters: Use filters to automatically dispose incoming messages. Each filter consists of a set of rules and a set of actions. Rules are matched against incoming message properties and on success actions are executed. You can use filters to:
- Move messages of different accounts into different folders
- Turn on "Download headers only" mode and create a filter to fully download messages only from contacts in your address book
- Mark important messages with red color
- Play different sounds for messages from different senders
- 2 votes
| Attachment | Size |
|---|---|
| 622.93 KB |
Archived - Simple Mail ChangeLog
- ADD : Option for blocking multimedia content in mail (switch in main tool-bar)
- ADD : Internal colorpicker for filter-action and text color for email messages
- ADD : Show alert when sqlite VACUUM is finished
- FIX : Preferences dialog can't close
- FIX : Icons style don't changed without reopen SM
- FIX : Welcome letter
- FIX : Can't delete mails from server (sometimes)
- FIX : Attachment icon not showed in saved to html mails
- UPD : Locales updated
- UPD : Preferences redesigned
V2.89
- ADD : Auto-config for accounts (predefined settings for many email servers)
- ADD : Filter rule for mails marked read\unread
- FIX : Backward compatibility for Firefox >= 16 (experimental)
- FIX : Can't get host name (Not Roman alphabet in host name)
- FIX : Can't apply filters without restart
- FIX : Error when add new address
- FIX : Folder disappear when drag and drop
- UPD : Many internal changes (something may be broken)
- UPD : Account set-up is totally changed
- UPD : Locales updated
V2.88
- FIX : Backward compatibility for Firefox >= 24 (experimental)
- FIX : No icon in status-bar
- FIX : No icons in status-bar pop-up menu
- FIX : Some locales fixes
- FIX : Can't modify rules in filters (sometimes)
- FIX : Can't apply filters now (sometimes)
- FIX : Very slow messages moving to folder
- FIX : Very slow deletes messages
- ADD : Added item "open in a new tab" to messages-list pop-up menu
- ADD : Added item "open in a window tab" to pop-up menu
- ADD : Added button "toggle read" to main tool-bar
- ADD : Make "mailto:" URLs (un)handled by SM now is optionality
- UPD : Many internal changes (something may be broken)
- UPD : Selected message immediately showed (when keyboard used)
- UPD : Was removed some obsolete code
- UPD : Locales updated
V2.87
WARNING : This version is not compatible with Firefox versions below 31
- UPD : Many internal changes (something may be broken)
- UPD : Various minor bugs
- UPD : ru-RU locale
- FIX : Can't modify action in filters by mouse double click
- FIX : Can't apply filters now (sometimes)
- FIX : Can't refresh mail from pop-up menu in main form
V2.86.8.1
WARNING : This version is not compatible with Firefox versions below 31
- UPD : Various minor bugs
- FIX : Can't modify address-book sometimes
V2.86.8
WARNING : This version is not compatible with Firefox versions below 31
- FIX : Compatibility with Firefox 45
- FIX : Can't send\receive mails
- FIX : Can't add\modify accounts
- FIX : Can't add\modify items in address-book
- FIX : Can't change font in message editor
- FIX : Infinity adding duplicate of selected font in font-selector
- FIX : ru-RU locale has wrong text in plaintextOnReceive
- ADD : Icons for pop-up menu
V2.86.7
WARNING : This version is not compatible with Firefox versions below 31
- FIX : Progress Meter stay after sent
- FIX : Compatibility with Firefox 31-32
- FIX : The search is performed on the fields to, from, cc and bcc
WARNING : This version is not compatible with Firefox versions below 16
- ADD : DTD declaration on saved mail
- FIX : Problem when choosing font for new mail
- FIX : Various little bugs
- FIX : Pop-up position under FX29
- FIX : Settings window size
- ADD : New skin
WARNING : This version is not compatible with Firefox versions below 14
- ADD : Option to hide completely status-bar icon
V2.86.4
WARNING : This version is not compatible with Firefox versions below 14
- - MODIFIED : The option to delete mails on receive when using a IMAP server is no longer available (This is not an IMAP feature)
- ADD : Option to set pop-up alerts always on top
- FIX : Classic pop-up close after 4 secs
- ADD : hu-HU locale (Gabesz)
V2.86.3
WARNING : This version is not compatible with Firefox versions below 14
- FIX : File permissions under Linux
- FIX : Sent Popup popup is not displayed if new message is in a new window
- FIX : Import .eml problem
- FIX : Problem on addresses with "Reply All"
- FIX : Unable to import mail file up to 100 Mb
- FIX : Problem with "Send by SimpleMail" option in drop down menu
- FIX : Problem with colors
- ADD : Option to open mail in a new window
- ADD : Option to open mail in a new tab
- ADD : SMTP Authentication
- ADD : ro-RO locale (alinbeg)
- ADD : Option to clean Database on exit
- UPD : some CSS improve
- UPD : Plain-text view
V2.86Beta6
WARNING : This version is not compatible with Firefox versions below 14
- ADD : Option to clean Database on exit
- FIX : change in export js code
V2.86Beta5
WARNING : This version is not compatible with Firefox versions below 14
- FIX : Minor bugs
- FIX : Problem on addresses with "Reply All"
- FIX : Unable to import mail file up to 100 Mb
- ADD : Option to open mail in a new window
- ADD : Option to open mail in a new tab
- ADD : SMTP Authentication
- UPD : Plain-text view
- FIX : Problem with colors
- FIX : Problem with "Send by SimpleMail" option in drop down menu
- ADD : ro-RO locale (alinbeg)
V2.86Beta1
- FIX : Problem on addresses with "Reply All"
- ADD : Option to open mail in a new window
- ADD : Option to open mail in a new tab
- ADD : SMTP Authentication
- UPD : Plain-text view
- UPD : Various minor bugs
V2.85.0
- ADD : Firefox 22 compatibility
- FIX : Problem with STARTTLS
- FIX : Problem on filter when use exclusion
- FIX : Unable to send mail over 800 Kb
- FIX : Problem with attachment's name with ' or [
- FIX : Bug on Signature in Plain Text
- FIX : Various bugs under the hood
- FIX : Shift+del work again
- ADD : Scroll in mail with Up and Down arrows
- ADD : Sort direction for AddresssBook
- ADD : Option to disable alert send/received emails in Plain text
- ADD : View size of attachments files
- ADD : Scroll on long messages with arrow keys
- ADD : You can mark a Mail as SPAM/NO SPAM by drag and drop in/out the SPAM Folder
- ADD : Option to enable log file (in the operating system's temporary files directory (for example, /tmp on Mac OS X and Linux, c:\windows\temp on Windows)).
V2.84.3Beta1
- FIX : Problem on filter when use exclusion
- FIX : Unable to send mail over 800 Kb
- FIX : Problem with attachment's name with ' or [
- FIX : Bug on Signature in Plain Text
- FIX : various bugs under the hood
- ADD : Sort direction for AddresssBook
- ADD : Option to disable alert send/received emails in Plain text
- ADD : View size of attachments files
- ADD : Scroll on long messages with arrow keys
- ADD : You can mark a Mail as SPAM/NO SPAM by drag and drop in/out the SPAM Folder
- FIX : Bug with Spam management
- FIX : Refreshing mail :
- -1 : No automatic refresh and no refresh clicking on refresh button, refresh only by clicking on account name
- 0 : No automatic refresh but refresh when clicking on refresh button and on account name
- +10, +20 : Automatic refresh, when clicking on refresh button and on account name
- ADD : Now, you can't add two addresses with the same email in the address book
- FIX : Attach multiples files don't work
- ADD : Popup when you send a mail
- ADD : After send return to the SimpleMail window if multiples tabs
- FIX : Bug with acknowledgements
- FIX : Problem in mails headers
V2.84
- ADD : New attachments display
- FIX : Progress bar don't update
- ADD : "Refresh Every" option for account with zero fill in, set manual check account
- ADD : Attachments are automatically placed at the end of the email when composing
- ADD : Option to display/don't display remote images in mails
- ADD : Sound notification
V2.83.3
- FIX : Compatibility with Firefox 17
- FIX : Bug in mail format
- FIX : "Hide counter toolbar when there's no mail" won't work
- ADD : Option for date format
- ADD (again again) : You can select a mail with right-click for deleting (or something else) without opening it (code re-rewrite...)
- ADD : Add simplemail's button on first install
V2.83.2
- FIX : Bug with acknowledgements
- FIX : Add a signature if you reopen a template
- ADD : New filter to auto forward mails
- ADD : Some cosmetic changes
- ADD : Check and send progress bar in the toolbar
- ADD (again) : You can select a mail with right-click for deleting (or something else) without opening it (code rewrite)
- ADD : Check mail in the background if SimpleMail tab is not focused
V2.83.1
- FIX : Problem sending some email
- FIX : Filters are movable again
- FIX : Auto sync don't work
V2.83
- ADD : Option to empty trash on exit
- ADD : Possibility to abort sending/checking mail
- ADD : Change icon when RE or FWD
- ADD : Add Lithuanian language
- ADD : Add Catalan language
- ADD : Add Japanese language
- ADD : Add Ukrainian language (thanks to Daniel Guerin)
- FIX : Mailto handler work now (thanks to Vaka)
- ADD : Option to open new mail in a new window
- FIX : SPAM Management don't work correctly - code rewrite
- FIX : Problem with email name with coma
- FIX : Space on the left of Simple Mail's button
- ADD : Option to avoid confirmation of deleting messages
V2.82
- FIX : Problem with import/export of Adressbook
- - REMOVED : "you can select a mail with right-click for deleting without opening it" coz peoples don't like it
V2.81
- - Same as Beta8
V2.81Beta8
- ADD : Simple SPAM Management
- FIX : Some cosmetic changes
V2.81Beta7
- ADD : Postal address and phone in AdressBook
V2.81Beta6
- FIX : Now work with Yahoo IMAP
- FIX : Problem with duplicate signature
V2.81Beta5
- ADD : New icons Oxygen by David Vignoni
- FIX : Mark as read option with zero fill in mark email as read immediatly
- FIX : Options windows won't close if open without the Simple Mail main window open (aka under add-ons page)
- FIX : Problems with "Email not found on the server"
- ADD : Management of acknowledgements
- ADD : Filter work on messages already received
V2.81Beta4
- ADD : Support of SMTP Authentication (STARTTLS)
V2.81Beta3
- FIX : You can't receive email with IMAP under Firefox 7
V2.80.2
- FIX : You can't receive email with IMAP under Firefox 7
V2.81Beta2
- ADD : You can now send AND/OR view mails in plain-text
V2.81Beta1
- ADD : You can select a mail with right-click for deleting without opening it
V2.80.1
- FIX : Error on Polish locale
- FIX : Multiple bugs in the V2.80
V2.80
- Same as V2.80Beta4
V2.80Beta4
- FIX : Choice for delete mails on server won't work correctly
- FIX : Transparent Popup should work under Linux
- FIX : Unable to send mail with pictures > 500Ko, Pdf > 1 Mo, Zip > 1Mo
- UPD : Locales
V2.80Beta3
- UPD : da locale
- ADD : sv-SE locale
- ADD : Hide counter on toolbar when there is no mails
- ADD : You can switch icons style between old and new
V2.80Beta2
- FIX : Error message related to some locales
- UPD : cs-CZ locale
- ADD : hy-AM locale
V2.80Beta
- FIX : Drag'n'drop files on message window work again
- ADD : Button for insert image in the message body
- ADD : Column read / unread with sort direction
- ADD : Show email counter as in status-bar, in button toolbar
- ADD : Transparent (only for windows), normal or classic Popup message
- ADD : Custom popup message timeout
- ADD : Export function now export messages in sub-folders
- ADD : New function Archive : you can archives your mails in a file (it can be put in the Thunderbird mail folder to be opened), a Zip file, or in an archive folder in Simplemail. You can archive all your mails (associated with a account) or only mails in a specified folder or mails before a date.
- FIX : Crash when you change folder or view mails
V2.78
- Code update
V2.77
- FIX : Attachments can now be opened
- FIX : You can add your own smiley's
- FIX : Auto-complete in the To: Cc: and BCc: fields work again
- - New icons (Nuvola by David Vignoni) : feel free to said if you hate or love !!
- 4 votes
3rd Party Extensions & Services

3rd Party Extensions & Services [ Page v0.9 ]
Extensions posted here are NOT created by telega.
These are great extensions, which can even be used to extend the functionality of telega's extensions.
Submission Guide: here. Submission form: here. User-Submitted: here.
Note: Items marked with "n/a" are in preparation, and will be available soon!
- 3 votes
Accessing Gmail with Gspace from Firefox / Fast Dial
Please also see Mafia Penguin's Tutorial Using Gspace
On AMO:
* THIS IS NO WAY AFFILIATED WITH GOOGLE AND GOOGLE DOESN'T ENDORSE IT. SO, INSTALL IT AT YOUR OWN RISK.
Gspace is a really useful tool.
It allows you to store those really essential files for use after a crash.
A sort of disc drive in the sky, that one can access almost as easily as ones Gmail account
What gspace does is to enable one to use the free space in one's gmail acoount to store files.
The files are stored as attachments in the mail
It is clear that one needs to have a Gmail email account in order to use gspace
1. Download the Firefox Extension
One can go to thiis URl and download "Gspace"
Similarly one can just go to AMO and download the Gspace extenision.
https://addons.mozilla.org/en-US/firefox/addon/1593
The result is the same
This Firefox Extension allows one to access gmail/gspace easily
2. Logging in to gspace
Once one has loaded the extension on can access GS by going Tools/Gspace
This takes one to the Gspage Page.
(it somehow reminded me of using Laplink )
Looks like this:
(click to expand)

The important thing first of all is to somehow log into Gspace.
On the gspace page click on Manage accounts

You will see this popup menu

In gmail ID enter one's gmail email address
Enter also one's gmail account password and select remember password
Hit add and then close popup (top right)
Next time you log onto gsave you should see your email appear to the right of the words Manage Accounts.
To login click on Login
Once one has logged in if one has any files in Gspace they will become visible
(I did see it mentioned somewhere that it is helps to have the following setting enabled in Gmail
Don't always use https)
Once one is logged in things are much easier
3. Gspace and Fast Dial
The first thing one notices is that ones url when logged in to Gspace becomes:
chrome://gspace/content/gspaceWindow.xul
So one is actually accessing a file in the Gspace extension in the Firefox Profile, in order to interface with Gmail
For Fast Dial users this is important to know , as it allows one to set the URL for a cell with this URL and not bother anymore with Tools/gspace.
I found it necessary to put a Logo in the cell otherwise the cell refreshes endlessly.
To find a good Fast Dial logo search UL Logos under Gspace
http://userlogos.org/logos/new?filter0=gspace&filter1=**ALL**&filter2=**...
(For other information on Chrome URLs and Fast DIal please see loading Chrome URLs into a Fast Dial cell)
So now one is set up and on can discover the real use of gspace.
4. Using Gspace
The left space one can browse to whatever part of one computer one wants
on the right space are the gspace files
One can make directories, open them and simply copy from left to right (or right to left) by pressing the arrows.
When files are being transferred there is a display that shows the progress

It is useful to remember that there is a refresh icon and that one can refresh the directories as one sees fit.
5. Setting up filters in Gmail to filter out Gspace messages coming to your inbox. (they are archived)
You may well notice gspace messages turning up in your Inbox
There are clear instructions as to how to set up the filter in Gmail
here:
http://www.getgspace.com/faq.html
Tried this.
Gmail seems to reconise the mail to filter, but still turns up in my pop3 mail
Have not resolved this yet
Some links to gspace articles on the net
http://www.ghacks.net/2007/03/07/gspace-firefox-extension/
http://tutorialninjas.net/2007/09/05/hidden-feature-turn-gmail-into-gspace/
http://www.downloadsquad.com/2009/01/06/do-more-with-gmail-storage-with-...
- 0 votes
Base64 image decoder /image maker
This is about a useful little Windows program for making an image out of a Base64 string.
To download the program please go here
---
This is what the program looks like

_________________________________________________________________________________________
Using the program
Find your code, select and copy paste into the base64 window.
The first thing to realise is that with this decoder the string that you should enter should be stripped of everything except the bas64 code itself
Nothing else
so none of this:data:image/png;base64
See image above.
Be careful about this
Head and tail.
Best to edit this stuff out in the Base64 window as it easy to control, even with large amounts of code
--------------------------------
Find it best to save to a particular file in a particular folder

To do this go to search select a folder and name your file and hit save

Once you have named your file and the address of the file is showing in the window hit decode.

And you are done

Hopefully, you should then find your image waiting for you in the Folder that you saved to.
Good luck !
- 1 vote
Colorzilla Not Available Yet
This has been a long time coming.
Pictures are slowly returning to Picamatic
Must have a go at this one soon....
- 1 vote
Coolpreviews
To download Coolpreviews please go here
Cool previews works very well where there are a lot of images and you want to get an enlarged Preview.
So very good with the new Google image search
http://googlesystem.blogspot.com/2010/07/google-image-search-adds-infini...
But also interesting to use with Fast Dial, as it opens not the Logo, but the URL that the cell refers to.
So in simple terms one can use Coolpreviews like a sort of active Fast Dial Preview.
For example you have the Fast Dial cell that is for Userlogos.
To the left of the cell and above you will see the blue Coolpreviews Icon.
If you click on the CP icon then not only do you find yourself in a sort of mini fast dial preview window, but the window itself is active.
This is faster than opening a new tab, and allows you to check quickyly how things are going in the site, and at the same time keep your Fast Dial page intact.
One can close the (cool)preview window easily with a click to top right close window.
The only shame is that the Coolpreviews window is unaffected by Pitaschio.
That is it cannot be closed with a quick click to the top of the window, and neither can it be made transparent.
Neither have I found a way yet to vary the preview window size
Good luck.
(If picamatic was alive and well I would have included some pictures)
- 0 votes
Detailed Instructions how to Load a Style into Stylish from UL
For more general information about Stylish please see here
________________________________________________________________________________________
Typically Styles written for Stylish are simply downloaded from Userstyles.
Find the Style you want and click load into Stylish and all is done
___________________________________________________________________________________________
However on this site we have a number of inhouse Styles.
To Load these one has to go though the following steps
1. Download Stylish
2. Copy all the text of the Style from the UL page
3. Open Stylish Manage Styles Window
4. Click on write
5. Paste in the text that you have copied.
6. Name the file
7. Save the file
8. If you get any errors it would suggest that you might have missed some detail when you selected the text, so please try again
________________________________________________________________________________________
Will expand this page with pictures, links and further text this evening
4.
- 0 votes
Excellent Instruction page on Tab Mix Plus
I found this excellent instruction page for Tab Mix Plus
I thought I would save the link here for reference
- 0 votes
Foxtab and Fast Dial
Going to write a little about this
Researching at the moment.
To download Foxtab please go here:
- 0 votes
Full Profile Backup with FEBE (Firefox Environment Backup Extension)
Details about Chuck Baker's Firefox Extension FEBE can be found at Mozilla Addons
Latest Version can be found there too
This is a useful tutorial by Chuck Baker
http://softwarebychuck.com/febe/tutorial/febe101.html
For a more General Introduction to FEBE on Userlogos please see here
Here I will outline how to set up FEBE to make a Full Profile Backup.
First go FEBE Options and select Full Profile Backup

It is also necessary to set up a Location where the Full Profile Backup can be saved to.
So First create a Folder and then Browse to it here:

I can recommend the date stamping and also to have a number of backup directories if there is enough room on your device.
Once FEBE has been set up to make a Full Profile Backup all you need to do to initiate a backup is to click on the FEBE Icon in Firefox

and the backup will start

To restore a Full Profile Backup in Version 6.2.0 please do the following

And follow the prompts
- 0 votes
GMail Redesigned
Gmail redesigned appeared originally as a Style in Stylish
Please see gumanov's post here
http://userlogos.org/node/898
This original software was produced by
Evgeney Naverniouk
see
http://www.naverniouk.com/
at
http://www.globexdesigns.com/
At some point the author to abandoned the Style and instead made into a Firefox extension
to download please go here
https://addons.mozilla.org/en-US/firefox/addon/8434/
The style was made just to alter the formatting and fonts of GMail
Which now it effects other google pages as well.
I have just learnt from Mafia_Penguin that Google has changed it's image search. It is a big improvement.
- 0 votes
Help with using Stylish
Apoloigies I see that most of the links on this page need updating...
This is a collection of links that I have put together for those interested in using the Firefox Extension Stylish
Download Stylish
Stylish Edit Window Tutorial by ChoGGi
ChoGGi's Guide to using Stylish Tutorial
Custom Userstyle made just for viewing ChoGGi's Guide to using Stylish by whatrevolution
whatrevolution's Guide to using Stylish Tutorial
here
Valacar's Specificity Guide Thread/Tutorial
here
Best way to design with Stylish Interview
Globex designs
Stylish Forum
- 2 votes
How to make your Fast Dial / Firefox page transparent with the help of Pitaschio
Learned about Pitaschio today from Jumpordie in this thread
This is a great discovery !
Not only will Pitaschio allow you to make your Fast Dial Page transparent, it will allow you to make any Firefox page transparent, in fact any windows app transparent, so you can see your desktop and any other stuff running underneath....
However it is important to realise that this does not just effect the Fast Dial background, but the whole Firefox page.
So the Logos in the Fast Dial cells are made transparent as well
To download Pitaschio please go here
Pitaschio download and install information
Pitaschio Manual from Home page
Very helpful link about Pitaschio
Another helpful link
OK
Once you have configured Pitaschio it runs in the background,
If one runs the pitaschio program itself or if one right clicks the Pitasccio Icon in the System Tray and clicks on settings

one is offered a configuration menu

If you look on this configuration menu you can see the transparency setting.
Adjust transparency by wheel
It is set to on by default
scroll the centre wheel of the mouse while over the title bar at the top of the windows page and you should be able to vary transparency,
see below under Transparency
click on Setting of Mouse shortcuts (bottom right) and this menu appears:

The great thing about how this program is made, is not only does it offer all these mouse shortcut options as default, but you can most easily modify tthe settings to your own personal preference and apply, thereby have your own custom settings tailored to your own needs.
click on setting of autoraise and this little menu appears

click on manage windows and this menu appears:

Transparency
It would appear that to alter the transparency of any windows application it is only necessary to move the centre wheel on the mouse while the cursor is over the windows titlebar at the top of the page of the application one is in
to quote:
I’ve saved the best for last. This is by far the feature I use the most. On the fly transparency adjustment for most windows (I say most because there are possibly some windows that don’t like being forced transparent but I haven’t come across any yet).
Not only is this feature useful it is also very easy to use: you simply place your mouse cursor over the title bar of a window and scroll the mouse wheel. Up for less transparent, down for more transparent. And to prevent windows getting lost, Pitaschio includes a transparency limit but even then the window is very hard to see.

It is worth noting that Pitaschio does not come with an installer
The result of this is that Picaschio does not load automatically in Windows on startup.
So has to be reset if transparency is wanted in Firefox.
To get round this:
Startup Folder
If you would like to run Pitaschio whenever you use windows, I recommend that you put shortcut to the Pitaschio.exe in the Startup Folder of Windows. The location of the Startup Folder is as follows:
c:\Documents and Settings\[username]\Start Menu\Programs\Startup
This seems to work well, especially if one is also showing Pitaschio Icon in the System tray..
Very easy then to access settings
Pitaschio enables the setting up of a whole lot of other settings in relation to the mouse.
Double click minimise (size remembered) double click maximise, on the windows titlebar, is very useful;
If you wish to set up Pitaschio to run in Launchy, please see below
I set up Pitaschio to run in Firefox using the Firefox Extension Launchy.
Maybe this is not necessary, but I like to run windows apps in this way.
So added this string to the launchy.xml in chrome
Pitaschio
1
C:\Program Files\Pitaschio\Pitaschio.exe
I do not know into which folder you will load Pitaschio in windows, so please check that your own location is matched by a correct string for your setup before saving your xml file
Once the xml is set up and working, click on the Launchy icon in Firefox and select Pitaschio to run

It is interesting to note that if one hovers on the Pitaschio icon in the tray that it gives the age of the moon...

Pitaschio is the creation of a free spirit
- 0 votes
Importing/Exporting Taboos
Taboo is a great extension. But sometimes, you have to get rid of your profile, or you want to move your Taboos to another profile.
To do this, simply copy your entire "Taboo" folder

from your profile

into your new profile.
Interesting Lifehacker Fast Dial Page

-------------------------------------------------------------------------------------------
The link to this page was suggested by sjdvda here
-------------------------------------------------------------------------------------------
The Lifehacker page on Fast Dial is here
------------------------------------
There are fair number of posts on this site with questions about Fast Dial
- 1 vote
It's All Text
It's all Text is extremely useful.
-----------------------------------------------------------------------------------------
------------------------------------------------------------------------------------------
It's all Text is a facilator, a link.
It allows you to use you favourite Text editor, just where you thought you could never use it .
-----------------------------------------------------------------------------------------
To set up It's All Text all you need to do is the following:
The next all important step is to set up in IAT which Text editor you want to use with IAT

------------------------------------------------------------------------------------------
There are many Text Editors
I happen to like
EditPad Classic
There is also EditPad Lite
Many technical users really like
Notepad++
The great thing about It's all Text is that you can chose any Text Editor you want.
------------------------------------------------------------------------------------------
The single most useful place for IAT's use has to be the
Stylish Manage Styles Window
_________________________________________________________________________________________
For the moment I find that any later version of IAT than 0.8.5 does not appear in the Stylish window
________________________________________________________________________________________

-----------------------------------------------------------------------------------------
Let us imagine you want to use Valacar's Google Image dark grey redesign
You will need however to change the code to use for any another country but America.
That means changing in the code every example of Google.com to your own country code.
This could be a major hassle.
eg
Download to Stylish
Copy paste to Editor
Edit
Copy from editor.
Open original Style.
Edit
Remove previous content
Paste amended Version
Save.
IAT makes thing easier
Find Style on Userstyles
Hit go as if to load into Stylish.
No need to save.
Hit advanced if it not already selected
Load into "it's all text"

In one fell swoop that will take all the text that appears in the Stylish Edit Window straight into your favourite text editor.
There you can do the "find and replace".
Close your text editor
(hit save if prompted)
You will now find yourself back in the Stylish window,
Then hit the Stylish Window save.
And all is done.
You will have edited the file before even it was saved into Stylish
This is a very elegant.
-----------------------------------------------------------------------------------------
Another scenario
You are on Userlogos
You want to write a post

Have a careful look at this picture.
If one puts one's cursor inside the Edit Box, a little blue marker appears bottom right.
On it is written the word EDIT.
Click on that blue button, and yes you are immediately placed in your favourite text editor.
Compose the post
Exit you text editor, and all that you have written will appear in the Userlogos Window.
This is really great.
Works also in Personal Mail as well.
----------------------------------------------------------------------------------------
- 1 vote
Kaelri ------ Firefox / Fast Dial Customisation
_________________________________________________________________________________________
The following links are related to this great post on Userlogos.
by Kaelri
________________________________________________________________________________________
Lifehacker Links
thanks to sjdvda
Lightning at Sunset
Aug 22 2008
Roll your own Lightning at Sunset Desktop
Aug 30 2008
Minimalist Firefox Goes Black
Nov 6 2008
From Mafi0z
Customise your own killer Enigma Desktom
Nov 15 2008
Share your enigma inspired desktops
Nov 17 2008 Related to the above post
_________________________________________________________________________________________
Kaelri Flickr Links
_________________________________________________________________________________________
Photostream Page Detail
Many Items 20+
---
Wing Detail
4 Items
Lightning at Sunset Detail
4 Items
Desktops Proper Detail
15 Items
_____________________________________________________________________________________
Here are the individual Pages
----------------------------------------------------------------------------------------
Revelation (Ancient Desktop 2)
Early 2003
Calm Before the Storm (Desktop 3)
Calm after the Storm (Desktop 3a)
Reverie Desktop(11)
July 15 2008
Lightning Sunset Desktop (12)
Aug 19 2008
LS: Enigma in Rainmeter
Sept 3 2008
Clouds Desktop(13)
Sep 26 2008
Wing Desktop(14)
Oct 11 2008
Wing Final
Oct 12 2008
Wing Firefox
Nov 5 2008 (with Fast Dial)
Wing Firefox Followup
Nov 6 2008 (with Fast Dial)
Mac OS XI
Nov 9 2008
Wing: "Arcs" Legend
Nov 16
Fata Morgana (Desktop 16)
Nov 18
FM:Variations on a theme
Nov 26
Leaf (Desktop 17)
Dec 3
Enigma 1.1
Dec 31
Runners High (Desktop 18)
Jan 4 2009
desktop 25
_________________________________________________________________________________________
Some Further Links
_________________________________________________________________________________________

- 2 votes
Launchy - Firefox Extension
![]() -----------------Launchy------------------------
-----------------Launchy------------------------![]()
This is about Launchy the Firefox Extension / Add-on NOT Launchy the Windows Application.
Please see accompanying
Launchy Modules for Launchy.xml
which is a useful list of codes to build up your launchy.xml file easily.
Launchy is a Mozilla, Mozilla Firefox, Mozilla Thunderbird, Netscape and Nvu extension.
To download Launchy please go here
On download please install the Launchy Icon on the Toolbar.
If you have autodetect enabled in Launchy

the following Applications with be autdetected by Launchy if you have them Loaded already in Windows:
* Browsers:
o Mozilla, Mozilla Firefox, Mozilla Firebird, Netscape, K-Meleon, Internet Explorer, Opera, Maxthon, Crazy Browser, Avant Browser, Slim Browser
* Mail:
o Mozilla Mail, Mozilla Thunderbird, Outlook Express, Outlook, Pegasus Mail, Eudora, Lotus Notes, The Bat!, IncrediMail, Calypso, PocoMail, Forte Agent
* Media:
o BSPlayer, Winamp, Windows Media Player, iTunes, Foobar2000
* FTP:
o Total Commander, UltraFXP, WS_FTP Pro, SmartFTP, BulletProof FTP, FileZilla, FlashFXP
* Download:
o GetRight, LeechGet, Mass Downloader, Star Downloader, Internet Download Manager, ReGet Deluxe, BitTorrent, FlashGet, WackGet, Offline Explorer Pro
* Editors:
o Notepad, UltraEdit, OpenOffice.org, Mozilla Composer, WordPad, Syn Text Editor, TextPad, EditPad Pro, Zend Studio, Vim, PSPad
* Image:
o XnView, Paint Shop Pro
Click on the Logo on the Toolbar and you will able to access the Launchy Options Menu.
If you have "select extended debug information" selected in Launchy you will be able to see in detail the process of Autodetection in the Error/Java Console

So you could see the following when you click on the Launchy Toolbar Icon and look in Launchy Options if you have those applications loaded in Windows:

I have found that the enable ticks available in the Launchy Options Window work fine for items that are on the Launchy List. However it would seem that items in the Launchy.xml file seem to overide the disable in Options .

If your program is not listed above Launchy allows you to add any Windows application, you wish to Launch in Launchy.
To do this however you need to create a custom Launchy.XML File
[Launchy.xml also works with other Operating Systems besides Windows, but of course the file paths are different]
To create a Launchy XML file please go here:
Create Launchy XML File here
---
You need to cut and paste the Output of the above XML Generator into a Text File Editor (Notepad is fine) and then "save as" the file as Launchy.xml into the Chrome Folder of your current Firefox Profile.
Please do this in UTF-8 and with save set to All files so that the file is not saved as launchy.xml.txt

To check the exact location of where the Chrome Folder is, to place the Launchy.xml file, open the Launchy Options and click on Launchy.xml and you will see the correct location shown.

To check how Launchy is interpreting your launchy.xml file, select in Launchy Options
"select extended debug information"

Then you can check if Launchy is having success or not loading from your launchy.xml
Please look in the Error console (Java) or the Jave Console
You should see something like the following:

I have at last got the Launchy.xml File to work
This is an example of a simple working launchy.xml File:
<?xml version="1.0" encoding="UTF-8"?>
EditPad
7
C:\Program Files\Editpad Classic\EditPad.exe
This allows you then to open the Windows application of your choice directly from Firefox
Once you have got a Text editor running in Launchy like Notepad, or an Editor of your choice, it is a relatively easy matter to modify your Launchy.xml file by adding or removing applications.
For example:
<?xml version="1.0" encoding="UTF-8"?>
EditPad
7
C:\Program Files\Editpad Classic\EditPad.exe
Notepad++
7
C:\Program Files\Notepad++\Notepad++.exe
Screenshot Captor
1
C:\Program Files\ScreenshotCaptor\ScreenshotCaptor.exe
For your information:
label: The name of the application required
command: The full path to the executable for the application required
arguments: The arguments for the application optional
type: The type of application required. The following types are supported:
1. Browsers (e.g. Mozilla Firefox)
2. Mail clients (e.g. Mozilla Thunderbird)
3. Media clients (e.g. Windows Media Player)
4. FTP clients (e.g. WS_FTP)
5. Download Managers (e.g. FlashGet)
6. File Explorers (e.g. Windows Explorer)
7. Editors (e.g. UltraEdit)
8. View Viewers (e.g. XnView)
You can use both %ProgramFiles% and %SystemRoot% and %HOMEDRIVE% and %HOMEPATH% in the command and arguments and they are substitutes with their appropriated values.
So you can add and run as many Windows applications as you wish
This is really great !

Moontools running on the Fast Dial 2.14 Page, courtesy Launchy

Home Planet running on the Fast Dial 2.14 Page, courtesy Launchy

Outlook Express running in Fast Dial
This works really well and I find fantastically convenient
Non standard settings see launchy.xml modules

Quickly check your setup
CPUZ running in Fast Dial courtesy Launchy

Further uses of Launchy
If for example you are on a Web Page in Firefox, you can right click on any image and then open via Launchy in an Image Viewer like IrfanView for example

Launchy download from AMO here
Launchy Homepage here
Launchy Author here
Launchy Swiss Army Knife here
Launchy Feedback to Author here
Launchy Reference Page on Launchy Home Site here
Create Launchy XML File here
Interesting list of Launchy Bugs with comments from the developer here
Launchy Notes
Mirror Site here
Launchy and getright
I think getright loads automatically now
Launchy.xml discussion in German
Mplayer on You Tube with Launchy here
[for Linux]
Launchy.xml file for emeditor Japanese here
Amo review Page here
- 0 votes
Launchy Modules for Launchy.xml
Here is a list of Modules that can be copy pasted and entered into an existing Launchy.xml File
All the Modules and examples shown here are for Windows.
But Launchy.xml will work with any Operating System.
But the file paths will be different.
Further modules will be added.
This is the overall modular structure of Launchy.xml
<?xml version="1.0" encoding="UTF-8"?>
Other App
2
C:\Program Files\other app\other-app.exe
another app
1
C:\Program Files\another app\another-app.exe
If any of these modules don't work please check to see if the path in Windows to the application that you want to run, is the same on your machine
Please see parallel post
Modules
Outlook Express is detected automatically in Windows by Launchy
However if you want to Launch Outlook in Firefox please try the following
This is not the standard setting, but the result is that you can Load Outlook Express in Firefox, check your mail and then return to Firefox.
This is most convenient.
		Outlook Express

		1

		C:\Program Files\Outlook Express\msimn.exe
Rocketdock thanks to Mafia_Penguin
   RocketDock

   1

   C:\Program Files\RocketDock\Rocketdock.exe
Editpad Classic
	EditPad Classic

	7

	C:\Program Files\Editpad  Classic\EditPad.exe
Notepad++
		Notepad++

		7

		C:\Program Files\Notepad++\Notepad++.exe
Moontool
		Moontool

		1

		c:\Program Files\Moontools\Moontool.exe
Home Planet
		Home Planet

		1

		C:\Program Files\Home Planet\HomePlanet.exe
HTML-Kit
            HTML-Kit

            7

             %ProgramFiles%\Chami\HTML-Kit\Bin\HTMLKit.exe
Screenshot Captor
		Screenshot Captor

		1

		C:\Program Files\ScreenshotCaptor\ScreenshotCaptor.exe
Windows Media Player (creates error but will work)
		Windows Media Player

		1

		C:\Program Files\Windows Media Player\wmplayer.exe
Safari for Windows
    Safari

    1

    C:\Program Files\Safari\Safari.exe

    -url
Editpad Lite
    Edit Pad Lite

    7

    C:\Program Files\JGsoft\EditPadLite\editpad.exe
-editor
GetColor!
		   GetColor!

		   1

		   C:\Program Files\GetColor!\GetColor!.exe
- 1 vote
Live Weather for Fast Dial!
It's finally here!
A cell showing live weather for any chosen ZIP code!
Screenshots (click to enlarge):


How does it work?
UserLogos user Mtlca401 sent me an application which he himself wrote, which can create a 300by225 PNG image file containing weather information for any chosen Zip code.
The package contains a folder of weather icons, a readme file, a configurator, and the application that updates the image and runs in the background.
Download Link:
Download!
The ReadMe text file contains information on how to set-up and use the "widget".
Contents of the readme:
Note: You may need to install microsoft .net framework if you don't already have it.
Link: .Net Framework 2.0
You only need to run the ConfigureWeather.exe
WeatherPng.exe loads and runs in the background as soon as ConfigureWeather.exe is opened.
Enter your zip code.
Select run on windows startup. Change the font color if you wish.
Change the update interval(seconds):
3600s = 1 hour
Once you are done configuring, Click Apply to preview your image.
Click Apply & Close when done..
The image will be created in the Fast Dial Weather folder, Weather.png
Use this as a custom image in Fast Dial.
Set the update interval for that cell equal to the one in the weather configurator.
NOTICE: On first run, you will most likely get the following error:
Just click "Continue", and it will never appear again.
Modifying earlier Extensions to work on a more recent Version of Firefox
_________________________________________________________________________________________
Some earlier Firefox extensions, for one reason or another, may have not been updated to work on the latest Version of Firefox.
This is often very frustrating, as one may have found the extension very useful in the past.
Sometimes one can get round this problem oneself in the following manner:
__________________________________________________________________________________________
The key to resolving this question lies in the Program 7-zip.
Please download here
Learnt about 7-zip from a helpful post by Mafia_Penguin here
__________________________________________________________________________________________
The first stage is to download a copy of the .xpi of the Extension one wishes to modify.
There are different ways of doing this.
________________________________________________________________________________________
1. The most elegant perhaps is to use Mr Tech Toolkit.
Go to AMO (Mozilla Add-ons) right click on Add to Firefox and you see the option Archive XPI

Once you have set up the Archive folder this is extremely fast and easy to do.
Thank you Mr Tech for this.
You may find on older extensions that the Mr Tech prompt does not appear on the AMO front page,
To remedy this click on See All Versions, the prompt will usually appear there.
_________________________________________________________________________________________
2. Another option is to right click on Add to Firefox and chose the option "save link as"

You will then have the following prompt:

_________________________________________________________________________________________
3 A third option is to use Internet Explorer. As it cannot install the .xpi file directly you are offered the option to save the file. In some situations you may find this method convenient. It is not the recommended method.

_________________________________________________________________________________________
_________________________________________________________________________________________
OK so we now have the .xpi
-
-
-
Modifying the .xpi
_________________________________________________________________________________________
Right click on the file and select the following option.
7-zip
Open archive

What 7-zip is doing is helpfully offering us the option to view the files without extracting them.
_________________________________________________________________________________________
What happens next is that 7-zip, again most helpfully, offers us the option to edit the install.rdf file while it is still in the archive.
Select the file (install.rdf) and then Right click on the file and select edit.
It is the install.rdf file that needs to be modified slightly.

_________________________________________________________________________________________
Once we go into Edit mode and look through the install.rdf file we will find the following information

You can see the line which includes the words maxversion.
This is saying that the file should not be intalled in a higher Version of Firefox than the one mentioned.
This is the information that we need to change.
Modify the text
Here the maxversion reads 2.0.0.*
This could be changed for example to: 3.0.*
Only the integers need changing.
And exit the Edit mode
At this point 7-zip most helpfully gives us the option to update the file in the archive.

Hit OK
And then close the Archive.
The .xpi file that you have left in front of you will have been modified
So you can now drag and drop it into your Add-ons and see if it works.
If you find there is a problem try re-editing the integer value.
________________________________________________________________________________________
The explanation here may seem rather lengthy, but you will find when you have done this a few times that it can be a really fast process.
________________________________________________________________________________________
So what 7-zip has helpfully allowed us to do is to edit the install.rdf file in situ, and allow us perhaps to continue using an extension that has fallen from grace.
_________________________________________________________________________________________
Thank you 7-zip
________________________________________________________________________________________________
_________________________________________________________________________________________
Another approach to this whole question is to use Nightly Test Tools.
Please see this post by Mafia_Penguin
_________________________________________________________________________________________
- 0 votes
My Image Here
Firefox Extension:
Simple tool for replacing an image on a Web Page with an image of your choice
Example:
Change Google Logo
1. Right click on Google Logo
2. Select My image here / Load image here in context menu

3. Browse for replacement Logo on your hard disk

4. Click on open and you have a new Google Logo

Change the Userlogos Site Logo
Right click on UL Logo

Browse for replacement

Click on Open and and Bingo !
A new Logo for Userlogos

I have wanted to do that for a long time !
Also there is useful option to force resize.
And also the option to remove inserted image with remove option.
and also remove all my images from this page.
Very simple and easy to use program.
Highly recommended
Can also be used a little like Adblock Plus.
If there is a repeated image that you find tiresome on a Blog or a Forum, you can replace it with an image of your choice (a transparent blank image maybe)
However many times that particular image appears on that URL, it will always be replaced with the image of your choice. :-)
It is my experience that the Extension NoScript interferes with the working of My Image Here.
Please be aware of that.
- 0 votes
Notepad++
This is a stub, simply so that it can be referred/linked to for Information
______________________________________________________________________________________
I have found using the extension Launchy that it is quite an easy matter to Launch Notepad++ from Firefox.
If you happen to like this Editor, you may find this quite useful

Please see my Pages on Launchy as to how to do this here
______________________________________________________________________________________
Notepad++ Video Tutorial/Introduction
_________________________________________________________________________________________
The below is taken from gmacri's post here
-----------------------------------------------------------------------------------------
Notepad++ is a free source code editor and Notepad replacement that supports several languages. Running in the MS Windows environment, its use is governed by GPL Licence.
Based on a powerful editing component Scintilla, Notepad++ is written in C++ and uses pure Win32 API and STL which ensures a higher execution speed and smaller program size.
By optimizing as many routines as possible without losing user friendlyness, Notepad++ is trying to reduce the world carbon dioxide emissions. When using less CPU power, the PC can throttle down and reduce power consumption, resulting in a greener environment.
Here are the features of Notepad++ :
Syntax Highlighting and Syntax Folding
Supported languages:
C C++ Java C# XML HTML PHP CSS makefile ASCII art (.nfo) doxygen ini file batch file Javascript ASP VB/VBS SQL Objective-C RC resource file Pascal Perl Python Lua TeX TCL Assembler Ruby Lisp Scheme Properties Diff Smalltalk Postscript VHDL Ada Caml AutoIt KiXtart Matlab Verilog Haskell InnoSetup
CMake YAML WYSIWYG
If you have a colour printer, print your source code (or whatever you want) in colour.
User Defined Syntax Highlighting
It allows user to define his own language : not only the syntax highlighting keywords, but also the syntax folding keywords, comment keywords and the operators.
Auto-completion
For most supported languages, user can make his/her own API list (or download the api files from dowload section). Once the api file is ready, type Ctrl+Space to launch this action.
Multi-Document
You can edit several documents at the same time.
Multi-View
You have two views at same time. That means you can visualize (edit) 2 different documents at the same time (screenshot). You can visualize (edit) in the 2 views one document at 2 different positions as well. The modification of document in one view will carry out in another view (i.e. you modify the SAME document when you are in clone mode..
Regular Expression Search/Replace supported
You can search and replace one string in the document by using the regular expression.
Full Drag ‘N' Drop supported
You can open a document by drag & drop. You can also move your document from a position (or even a view) to another by drag & drop.
Dynamic position of Views
The user can set the position of the views dynamically (only in 2 views mode : the splitter can be set in horizontal or in vertical).
File Status Auto-detection
If you modify or delete a file which opened in Notepad++, you will be notified to update your document (reload the file or remove the file).
Zoom in and zoom out
That's another fantastic function of Scintilla component.
Multi-Language environment supported
The Chinese, Japanese, Korean, Arabic and Hebrew Windows environments are supported.
Bookmark
User can just click on the bookmark margin (located right side of line number margin) or type Ctrl+F2 to toggle a book mark. To reach the bookmark, type just F2 (Next bookmark) or Shift+F2 (Previous bookmark). To clear all bookmarks, click the Menu Search->Clear All bookmarks.
Brace and Indent guideline Highlighting
When the caret stay beside of one of those symbol { } [ ] ( ) , the symbol beside of caret and its symmetric opposite symbol will be highlighted, as well as the indent guideline (if any) in order to locate the block more easily.
- 1 vote
Open Profile Folder
This is a fantastically useful little extension.
Can be Found on the Mozilla Addons Site here.
to use in Firefox
Go tools/open profile folder
that simple !!
This extension is best for looking around.
It is possible of course to edit files, but as Firefox is still running there are of course still limits as to what you can do.
For major changes, I suppose it is still best to edit in Windows with Firefox closed. But for most jobs this is not necessary.
Still you don't want to cut off the branch you are sitting on !
Enjoy !
It is worth noting that for Example Fast Dial has a Fast Dial Folder in the Profile.
But if you go to the Extensions folder in the Profile, there is another Fast Dial Folder.
Similarly for Simple Mail
- 0 votes
Pale Moon
The Pale Moon home page is here
Pale Moon Release Notes here
Pale Moon Version 25+ for Windows XP here
Pale Moon Sumozi here
Extensions that do not work with Pale Moon Version 25 here
Pale Moon review here
Interview with Mark Straver here
There is small windows utility available on the Pale Moon site,that copies the Default Firefox Profile to the default Pale Moon profile This process seems to work and is quite painless
I had Firefox crashing a lot and thought I would try All works just like Firefox (but without Australis)
I had come across this statement on the web:
Switch to Pale Moon.
I’ve just been FED UP with FF because of all of the memory leaks, etc. I've been running v16 forever because whenever I’ve tried to upgrade to newer versions, they’d all pretty much just crash after 30 minutes of heavy use, and not a single version of FF that I’ve ever used has ever fixed the memory leak problems. Not a single one. I actually installed a tiny batch file on quicklaunch so I could quickly kill FF at the point it’s consumed all of my RAM so I could then start over with “Restore Session” to automatically reload all of my previous tabs. After trying every “solution” to the leak problem, that’s the only one that ever did me any good. Apparently the arrogant tards at mozilla would rather tweak the UI to death rather than make a browser that actually works. They’re worse than even Microsoft because Microsoft has to listen to their customers sooner or later or go broke, whereas nonprofits can just drift along forever. At any rate, I just finished installing PM, including importing everything from FF with their little importer program, and everything went flawlessly, including all settings and the plethora of add-ons I use. The only difficulty was getting roboform attached, which I can’t live without. I did finally dumb around and got the roboform taskbar program to attach roboform to PM, which then worked flawlessly. It is, however, necessary for the roboform taskbar program to run all the time for roboform to continue to work on PM, but this is a very small price to pay to ditch FF forever. I've used PM for a week now, opening/closing/keeping hundreds of tabs a day, and I’ve been stunned at how much faster PM is than FF, as well as the VERY small memory footprint occupied by PM vs FF. Even after a week's HEAVY usage, PM has not grown beyond 1 GB, and even better, when I close tabs, ALL of the RAM is given back. Basically, PM is what FF ought to be. Even better, the genius behind Pale Moon, Mark Straver, has committed to keeping the PM UI fundamentally unmolested. I’ll be installing PM instead of FF on all of my client’s computers in the future as well! (BTW, ALL of the "recommended fixes" for the firefox memory leak problems are a sick joke. Not one of them works. And plugins DO NOT cause the memory leaks! Firefox does! How do I know? Because I switched to Pale Moon, importing everything EXACTLY like it was in Firefox and guess what? No memory leaks in Pale Moon! Oh, and I use Adblock Plus, Flash, Java, DoNotTrackMe, BetterPrivacy CookieCuller, DownloadHelper, Element Hiding Helper, IE View, ViewAbout, Visited, and roboform. So NONE of those is causing the firefox memory leak problems!)
- 0 votes
Pale Moon 25 and Fast Dial

To resolve this matter, go to Pale Moon/Tools/Options/Tabs and set new Page to Quickdial Page
The Quickdial page is equivalent to the Firefox Newtab Page
This should resolve the matter

Thanks to Deva for drawing attention to this solution
This has all chaged since 27.7.0 as one can set new Tab to open on Home Page !!
- 0 votes
Pixel Ruler for Windows
This is a great little Pixel ruler
Learnt about this from dk00111... here
---

Am using it a lot at the moment, and will post some pictures soon.
---
This is a Windows application
But it needs Microsoft .NET Framework (89.2MB) to run, if you have not got it installed.
---
You can run the program from a shortcut in Windows and/or from Launchy in Firefox.
---
Once the ruler is on screen it stays there.(until you ask it to exit)
So you can run any application you want and the ruler stays just where it is.
---
All the controls are on the ruler in little icons left and right.
Useful is that it can make itself tranparent.
And well many other things.
You can change the length of the rule, you can make it horizontal or vertical.
Seems to be pretty bomb proof.
---
Description
A Ruler for Windows is an on-screen pixel ruler for your PC. It provides your choice between a rich wood grain ruler, or at the touch of a button, a clear see-through plastic ruler. As you can see through the clear plastic ruler you can even continue your typing under it. Special 2x, 3x, and 4x modes allow you to take a snapshot of your primary screen and magnify it so you can more easily measure between very fine points.
The ruler can be flipped horizontally or vertically, resized to an exact length or resized by dragging it to a desired length. You can click near a tick to have a measuring line automatically drawn at an exact location. The question mark button allows you to learn more about other features and functions. Version 1.1 includes various new functions, including keyboard controls to match ruler controls
---
This is a picture of the Pixel Ruler in Action
(please click on image to expand)
This is an image of Firefox/Fast Dial in Fullscreen Mode
1024x768

also

---
Enjoy
- 0 votes
Posting images on UL using Picamatic
There are different ways of posting images on UL.
I use two methods using Picamatic
A) First method
1. Upload image to Picamatic
2. Select and copy this link

3. Paste whole link into UL.
This will give an image that expands if clicked on
Result example

B) Second method
1. Upload image to Picamatic
2. Select and copy this link:

3. Go to UL Page
Left click on Insert/Edit image Icon top left of window

Then Paste in link from Picamatic into the URL field in the pop-up.

Click OK
This will give an non expandable image.
Here is an example

Good for smaller images
- 0 votes
Screen Shot Captor (in preparation)
ScreenShot Captor
---
Video Tutorial
(Not for current Version)
---
I find this Program really excellent for making images of the screen.
It has many many functions.
I will outline here the basic functions that enable one to take a picture of the whole or part of the screen.
----------------------------
A quick tutorial on your first use:
1. Start Screenshot Captor and press the close button to minimize it to the system tray if it's not already configured to do so.
2. You should see a blue monitor icon in your tray letting you know it's running and ready.
3. By default Screenshot Captor is configured to capture the entire screen when you hit the PrtScr button, so do that.
4. You should hear a capture sound and see the tray icon turn momentarily red.
5. Your screenshot has now been captured and saved to a file.
6. Take some more screenshots if you like. You can try alt+PrtScr to capture only the currently active window, or right-click on the tray icon to select additional capture modes.
7. Each time you capture an image it is saved to a file.
8. Double click the tray icon to bring up the full Screenshot Captor interface. Your screenshots will be shown as thumbnails on the left panel, with the last screenshot taken already selected and displayed.
9. From here you can easily select a region and crop your images, add effects and comments, and then save the images someplace permanent (or drag and drop from the thumbnail display to someplace more permanent, or copy and paste the image to the clipboard).
----------------------------------------------------------------------------------------
I will describe with pictures what I find the easiest way to use this program.
The settings in the program are extremely complex and well outside the scope of what I want to show you.
The only settings worth making to get startede are the three here.

________________________________________________________________________________________
To take a picture I use Fn (Function) and Prt Scr (Print Screen)
-----------------------------------------------------------------------------------------
This is now a little tiresome because well like a camera it is not easy to take pictures of itself
Let us look at this screen

This can be broken down into the following:

- 1 vote
Setting up a script in Firegestures to return to the Fast Dial page with a gesture
Thanks to this post by Userlogos member vince2010091 on how to set up Firegestures in Fast Dial, I thought I would put something together here for non Firegestures users.
What Firegestures does is that it allows you to make commands out of simple drawn shapes.
Once you get used to this, it is very quick and intuitive.
So download Firegestures from AMO
Go to Firefox Addons Page, find Firegestrures and click on Options:

And then Mapping:


Copy paste in this string:
Name : Fast Dial
Script :
const URL = "chrome://fastdial/content/fastdial.html";
const IN_NEW_TAB = true;
const IN_BACKGROUND = false;
if (IN_NEW_TAB)
gBrowser.loadOneTab(URL, null, null, null, IN_BACKGROUND, false);
else
gBrowser.loadURI(URL);
Gesture :DRUL
(If you know of other Firegestures gestures please enter you own gesture.)
DRUL is a square drawn anti-clockwaise with the right mouse button held down.
So Down-Right-Up-Left
This can take a number of forms
But a small case b would seem to work, as does a 6.
This is the more complete gesture:

I have to say in relation to Fast Dial that this gesture is also very useful, as it removes tabs.
This is DR.
Down-Right.
A Firegestures gesture to close a tab.
As Fast Dial is always there in the last tab, this is also a good way to return to Fast Dial.
No need to set up a script.
Here is the Gesture


For more information on different Firegesture Gestures, please see here
You can see which gestures have already been assigned by Firegestures, by examining this page in detail:

Enjoy !
PS
As I use userlogos.org a lot, so I put this little script together
const URL = "userlogos.org";
const IN_NEW_TAB = true;
const IN_BACKGROUND = false;
if (IN_NEW_TAB)
gBrowser.loadOneTab(URL, null, null, null, IN_BACKGROUND, false);
else
gBrowser.loadURI(URL);
Used the gesture DRU which was assigned elsewhere by Firegestures.
DRU is the shape of a U drawn on the page with right mouse held down
Works great !

So U for Userlogos... :-)
Also a gesture for Picamamtic
const URL = "picamatic.com";
const IN_NEW_TAB = true;
const IN_BACKGROUND = false;
if (IN_NEW_TAB)
gBrowser.loadOneTab(URL, null, null, null, IN_BACKGROUND, false);
else
gBrowser.loadURI(URL);
GestUre:URDL
This gesture (URDL) seems to work:
Up-Right-Down-Left
So can look like a box:

Can also Look like a P


So P for Picamatic !
So all this seems to work fine.
Firegestures is quite handy, especially if you work full screen.
Once you have Firegestures installed it is quite fun trying out different gestures and see where it takes you
Try drawing a circle (anti-clockwise, with right mouse click down).....
O (LDRUL) for ........


- 0 votes
Stylish-Custom
To download Stylish-Custom please go here
Came across the existence of ChoGGi's Stylish-Custom
It took me some messing around to get Stylish-Custom going
I found it worked however with Stylish Version 1.1.1 installed
This is ChoGGi's brainchild and is quite wonderful
Stylish-Custom has a whole lot to offer...
The most fun is excluding a Style from working on a certain URL
This is very useful and is a facility that I have wanted for ages
Please follow the description in the first link above on how to get things going
Oh and Midnight Surfer is a great Global Style
The best I have ever seenin fact
enjoy
this long thread may be of interest too
http://forum.userstyles.org/discussion/2799/stylish-custom/p1
- 0 votes
Tab Effect
This was one of my favourite extensions
Used to work just fine on Firefox 2
Troubleshooting at the moment to work on Firefox 3
I will write this when I have resolved the problem
Thanks
_______________________________________________________________________________________
1 link
(alter the speed of tab effect
________________________________________________________________________________________
Notes I am working on just now:
If you are having problems with getting Tab Effect to work there is most likely an issue with your direct x or your graphics Card.
The best way to check this is to go to start > Run and type in dxdiag. Check the notes at the bottom of each tab and see if there is a problem. The display tab will most likely contain problems in its notes. If so install your graphics card manufacturer driver plus any updates for it directly from the manufacturer website. Once you have done this restart your computer and go back to dxdiag. Check the display notes and the driver problem should be fixed. Now check the Directdraw and direct3d functions by clicking the test for each one. This should now fix your problem.
If you still have an issue. Check the version of your Direct x in the system tab of dxdiag. If it says version not found then you will need to install direct x again. If after installing or you are having problems reinstalling direct x then go to start > run type regedit - go to HKEY_LOCAL_MACHINE>SOFTWARE>MICROSOFT>DIRECTX
Right click Direct x and go to permissions. Ensure you select Full control for administrator and any other account. If your account is not there add it to the list by clicking add and typing your account name then click check name and add it. click ok
Ensure that there is a value for the registry Key data on the right. If not right click default and then modify. type 4.09.0000.0904 then click ok.
The final thing to to would be to right click the direct x folder on the left and select new > string value. Right click the version key that has appeared and modify its data to 4.09.0000.0904
You should now see your direct x version in dxdiag and oh yes Tab effect should work!
- 0 votes
Tab Mix Plus
Tab Mix Plus is a Firefox Extension/Add-on
To Download please go here
Tab Mix Plus homepage here
Tab Mix Plus is an extremely versatile Extension.
Once installed it seems more part of Firefox than a separate extension so seamlessly does it work together with Firefox
The question of Tab Mix Plus comes up in so many different contexts
- 0 votes
Textarea Backup for Greasemonkey
Never knew this one even existed.
Would not be without it now
How many times have I had to retype a PM or a comment.
This little script helps with this problem
Download here
http://userscripts.org/scripts/show/7671
Need of course to have greasemonkey loaded
A little disconcerting sometimes, because you may see your last comment in a thread instead of seeing a blank box, so one may inadvertently load the same comment again
But one gets used to all that.
Saves a lot of anxiety and freezing tabs with TMP to try and not lose the page.
Remembers everything !
Gives the option to use or not to use the remembered text
Enjoy
- 0 votes
Theft of about:blank by the Yahoo Toolbar
I have tried to use every instruction available in setting up Fast Dial on my system yet no matter what settings I use Yahoo Search always appears on new tabs opened. I just want the fast dial page to load on new tab or window instances but even setting it to use about:blank and setting the homepage to blank has no effect. Please advise!
I have not tried this, but the procedure seems self explanatory
http://medicine-opera.com/2010/03/how-to-disable-yahoos-theft-of-firefox...
Please also see this and other comments regarding one extension
"I found by process of elimination in my add ons, that the problem on mine was the Freeze.com NetAssistant Copyright (c) 2010 W#i Holdings, LLC,. All rights reserved. That is what was causing the issue on mine, though I found that I could disable it, but can not uninstall it."
You will also see references to possibly modifying about:config settings related to this extnsion
Once you have sorted this, fast dial should re-appear as normal.
Please let us know how you get on.
»
- 0 votes
Using Abduction!
Download here.
Abduction! is a very useful screenshot tool within Firefox to convert a part of a webpage into an image.
It has the advantage that, unlike print screen, you can capture a whole web page, including where you would previously have to scroll and take another print screen and manipulate them together.

Capturing a screenshot using Abduction!
Right-click on the page you want to capture and select "Save Page as Image"
Then select the area you want to capture. It can be small:
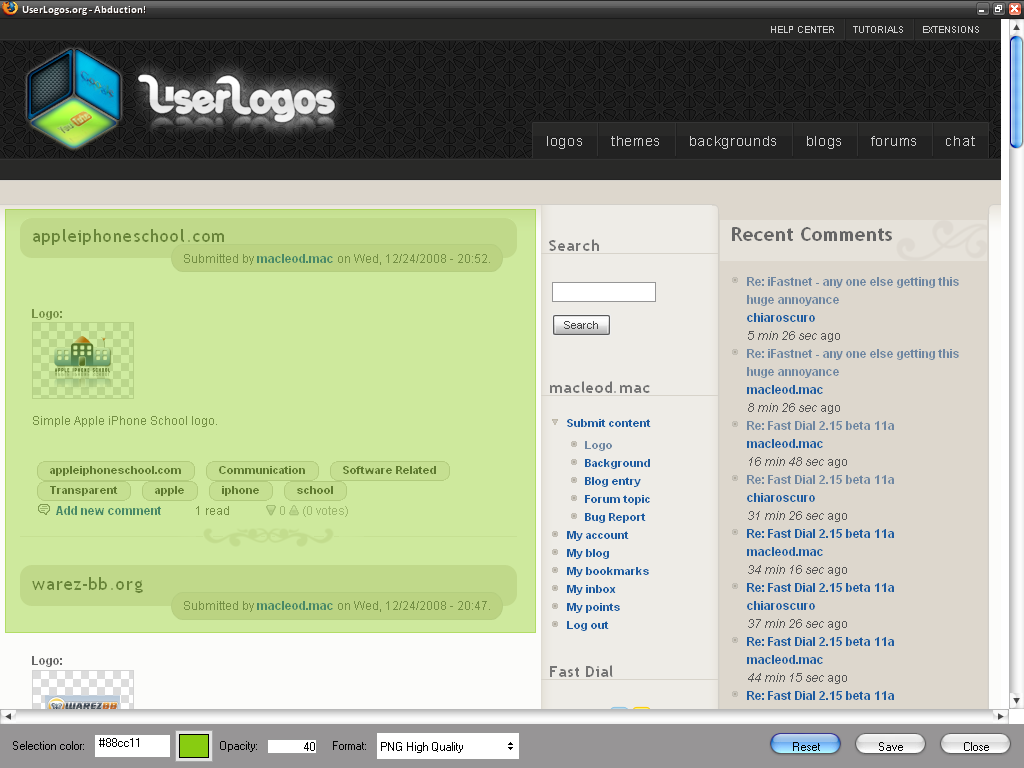
or large:
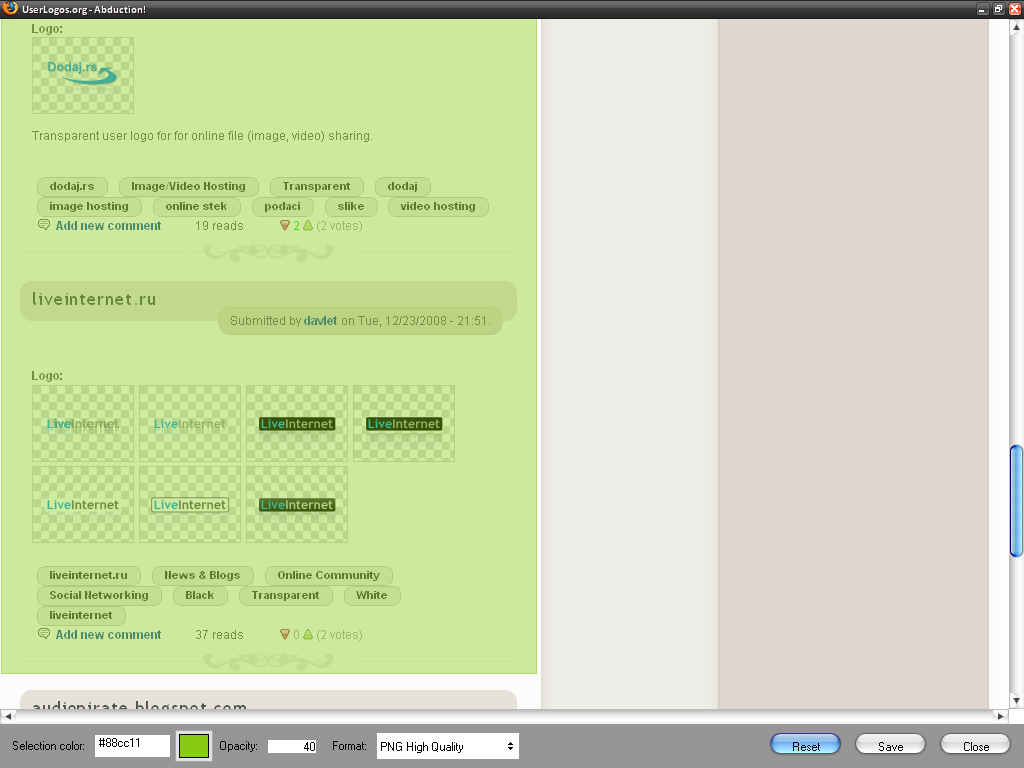
You can easily change options for image quality and selection area at the bottom left hand corner:

Then simply save where you want the image to go:

And you're done!
Using FEBE
Using FEBE (Firefox Environment Backup Extension)
Requirements
FEBE Menu
The menu for FEBE is under "Tools". Once there, you will see
- Perform Backup
- Restore:
- Restore Extensions
- Restore Themes
- Restore Bookmarks
- Restore Preferences
- Restore Cookies
- Restore userChrome
- Restore Usernames and Passwords
- Restore Phishing Data
- Restore Search Plugins
- Restore Browser History
- Restore Formfill History
- Restore Permissions
- Restore User-defined backups:
- Febe Data
- Restore Profile
- Quick Backup
- FEBE Options
Important:
To back up Stylish Styles, please see this!
Perform backup does exactly as it says:
It launches a backup of your profile.

You can set what it restores in the "Options" pane in the FEBE Options.
When FEBE backs up bookmarks, it also backs up all of your Fast Dial data (URLs, logos, background, and placement).
Quick Backup allows you to back up individual extensions and themes.

The green items are Themes, the blue items are the extensions, the grey items are disabled extensions, and the red items are incompatible extensions/themes.
It is possibe to combine all the checked items in to one installable XPI file.
When you have selected which addons you want to back up, simply check the box that says "Create single XPI" and click "Backup now", or just click "Backup now".

Then, a conformation dialog box will appear in the lower right hand side of your screen. It will tell you how many things were backed up.

Restoring a profile
- To restore a full profile, go to Tools>FEBE>Restore>Restore Profile.
- To restore a partial backup, go to Tools>FEBE>Restore, and select the type of information you backed up.
- Options
- Directory
- Schedule
- Debug
- box.net
- Info
- FEBE Options
There are six buttons at the top of the FEBE options dialog.

Options

This pane is the main options panel. It allows you to select a full profile backup, or just a custom backup. It allows you to choose what additional items (bookmarks, cookies, etc.) to back up.
To back up your Stylish styles:
Go to Tools>FEBE>FEBE Options
Click on "User-defined backups".

Click "New".
Fill out the information, and check "Include in backup". Click "Post entries and exit".
The file you chose will be backed up, meaning if you selected stylish.rdf, it will back up your styles.

This pane allows you to choose where your backup goes, and wether or not it has a timestamp on it. It also provides an option to clear the directory before making the backup, and how many backups to keep.

This pane allows you to schedule backups for your profile. It also allows you to see how your last backup went, and the location of your last backup.
Debug

This pane allows you to reset the FEBE prefrences. It also allows you to verify the extension directories.
Box.net

This option allows you to log in to a Box.net account. Box.net is a site where you can host your files.
This pane gives you an option to log in to a Box.net account.
Info

This dialog box contains helpful links, the version number of FEBE, and the e-mail to reach the author at.
For more information, please see FEBE's homepage.
Using Firefox Persona images as Background in Fast Dial
I have been asked about the feasability of using Persona images as Fast Dial Background
How can I get the Themes picture as background in FD?
There is an obvious immediate problem with this idea
The size of the persona images is 3000px wide x 200px high
This is not really the shape of the fast dial background.
You would have to decide if you wanted to tile these images as background or find a large version of the background and use part of it.
Perhaps try as a test saving this persona image to your PC and then loading as a background image into fast dial: (click on image to expand)
http://www.getpersonas.com/static/img/Persona_Header_LABS.jpg
Let us first see if you can see the image.
Best to tile the background.
You should then see a background made up of strips.
Once you have got that one working, you can play around...
(I have tested with this image.
It does work fine in tiled mode)
here is a gallery:
http://digitizor.com/wp-content/plugins/wordpress-toolbar/toolbar.php?wp...
I thought I could see that when choosing transparent in FDs preferences. But this only gives me a white background. What am I doing wrong?
the background colour only shows when there is no image.
If you have a small image loaded as background in centered mode, you may not see it easily unless you go into tiled mode.
- 0 votes
Using Gspace
Coming Soon!
For now, here is what I have:
Using Gspace
This article gives instructions on using Gspace. To get a Gmail account, please visit Google.
What you need:
Firefox
Gspace
A Gmail account
To access Gspace, either go to Tools>Gspace, or type in
chrome://gspace/content/gspaceWindow.xul
in your browser.

When you are at the Gspace screen, clcik on "Manage Accounts" at the top-left corner.
A box will pop up:

Fill in your Gmail account. I will be using one I just made for this extension, mp7125@gmail.com.

Click on the "Add" button. Then click on the "Close" button.
On the main screen, click on the "Login" button on the right side of your email address.

Gspace will log you in.
You can now select files on the right half of your screen, click on the "Right" arrow in the middle of your screen. That will transfer your files to Gmail. Beware that to download files, you need to use Gspace.
Modes
In the top bar, there is a button that says "File Transfer Mode".
Click on it to reveal:
File Transfer mode (For transfering files)
Player Mode (For playing audio)
Photo Mode (For viewing photos/pictures)
Gmail Drive Mode (I don't know, but it can be slow, and it is download only)
Using Picamatic
Picamatic for Image Hosting is no more
Not exactly an extension, but am posting here as well.
Picamatic is a free and very simple way to post images on Userlogos in your posts.
No advertising, no hassle, a great service.
Using Picamatic
If you go to Picamatic.com you will see the following screen:

or if you prefer a darker screen (with one image upoaded)

If you look at the Picamatic display you will see top left that you have the choice to either view the page in English or in Russian.
I do not speak Russian so we will look at the English settings only.
The suprising thing about Picamatic is that you are never prompted for any ID or password or anything.
And if you upload from a computer well somehow Picamatic remembers who you are, so that the next time you log on to Picamatic (on the same computer) you will automatically see your images.
However it is worth noting that if you need to use a different computer, that there is this option. See the Picamatic FAQ
Where to register?
You don't have to – you are already registered automatically. Click 'Save these images' after you upload one or more images. You'll get your persistent link (aka permalink) saved and sent to your mailbox. Bookmark this link and use it to access your uploaded images and photos anytime you want.
In fact if you do as this says and click on "save these images" you will see this prompt.
Type in the e-mail to which you will receive a link to all your images:
If you right click on the word "link" and choose "copy link location", you can then simply paste the "permalink" directly to your Fast Dial Cell for future use.
This link identifies that you are the "owner" of the images that you have uploaded.
This permalink is worth hanging onto.
For this is the only way you can lay claim to your images should you own computer fail.
Using Picamatic to upload your images.
Go to the Picamatic site
Click Upload on a free Picamatic cell, on the prompt browse to the picture on your computer that you want to upload.
Select the picture
Wait while Picamatic uploads the picture.
When this is finished click on Links (bottom right of the uploaded picture) and then you will see four Options.
I recommend that you click on "Copy Link" to the right of "Blogs", the second option from the bottom.
![228613_407x405[1].jpg - image uploaded to Picamatic](http://www.picamatic.com/show/2008/10/24/10/03/1236475_bigthumb.jpg "228613_407x405[1].jpg")
Clicking the "Copy link" means that the link is already copied into the computer, so all you need to then is to paste this link to your post.
And you are done.
This is an effortless procedure with Picamatic.
Each stage is made extremely simple for the user.
There is no advertising.
Picamatic, I think you will find, is a real pleasure to use.
- 1 vote
Using ReloadEvery
Using ReloadEvery:
Requirements:
- Firefox 1.5-3.x
ReloadEvery is a fairly simple addon.
To use it, simply right click on a page:

Hover over the "Reload Every" entry and you will be presented with a list.
The "Enable" option enables ReloadEvery and sets the refresh time to whatever the selected time is.
The "Enable All Tabs" makes it refresh the page on all tabs at the same time.
The "Disable All Tabs" makes it stop reloading the tabs.
Custom:
The "Custom" button presents a dialog box

Fill in the boxes, click OK, and the page will be reloaded as often as you want it to be.
This is useful for Sports news (OK, or making your entry on UserLogos seem like it has a lot of views!)
Using Rsizr.com
This isn't really an extension, but:
Using rsizr.com:
Step 1.
Select an image.

Step 2.
Go to rsizr.com.
Step 3.
Select "Upload an image". Browse to the file you want to retarget. Click "Ok".

Step 4.
Using the Preserve tool, select all of the details that need to keep their aspect ratio (Jack-O-Lantern).

Using the Remove tool, select all of the details that you want to remove (Tree, or maybe a person).

Made a mistake? Don't worry, just click "Erase" to remove the mistakes you made.

Step 5.
Select the retarget tool.

With the mouse, grab the arrows at the sides of the image (One on top, one on the left), and drag them as far as you want to shrink the picture. Don't want to shrink it? Do it anyway.

Wait for the red bars to flash through your picture.
Step 6.
Grab the squares on the corners and sides of your picture, and retarget!

Step 7.
Hit the save button on the top bar. A dialog box will appear to the right of your photo. Choose your settings, and click on "Save".

Step 8.
Enjoy your photo!


Zippy Extension Packager 2
Problems with the extension for the moment....
So I am editing document elsewhere....
- 0 votes